Overview

Pokémon FireRed & LeafGreen Companion 2026

Massive route-by-route rewrite that mirrors Bulbapedia’s cadence: exhaustive tables, contextual narrative, elegant typography, and modern monetization rails. Use it as a bookmarkable atlas for casual play, Nuzlockes, or challenge routing.

Coverage
Pallet Plains → Sevii Islands → Elite Four rematches
Guide Voice
ClawCloner · Deep descriptive Bulbapedia
Tools
Type-aware Team Builder · Persistent Nuzlocke Ledger

How to read this atlas

Everything is chunked like an encyclopedia. Each route entry contains narrative flow, wild encounter saturation, trainer-by-trainer breakdowns, and item sweeps. Each gym entry packs full movesets, badge gating logic, and counter suggestions. Major dungeons and Sevii beats get their own cards so you never lose context.

Use the quick filter in the sidebar to jump to specific anchors (e.g., “Route 10” or “Blaine”). Mobile readers can collapse details to keep performance tight.

Move Tutor Priorities

  • Ember Spa (Kindle Road): Rock Slide, Explosion, Substitute. Spend Big Mushrooms here before post-game to supercharge Golem, Snorlax, and sweepers.
  • Two Island Cape Brink: Blast Burn / Hydro Cannon / Frenzy Plant for fully-evolved starters after Elite Four.
  • Four Island Move Maniac: Softboiled, Seismic Toss, Counter, and Body Slam in exchange for mushrooms—critical for Chansey/Snorlax builds.
  • Sevault Canyon dojo: Swords Dance + Double-Edge combos for Dodrio, Kangaskhan, and Aerodactyl.
  • FRLG-exclusive tutors: Thunder Wave (Saffron), Mimic (Saffron copycat), Dream Eater (Viridian), and the elemental punches (Two Island) for trade evolutions.

Nature Quick Reference

Nature+Stat-StatIdeal Users
CarefulSp. DefSp. AtkSnorlax tank builds, Curse/Rest sets.
RelaxedDefenseSpeedSteelix, Slowbro, defensive Venusaur.
QuietSp. AtkSpeedMixed sweepers like Typhlosion tradebacks or Magneton Trick Room strats.
BraveAttackSpeedTrick Room Marowak/Golem (post-game) or Sunny Day Victreebel.
Hardy/Docile/BashfulNeutral natures for HM companions or pickup Meowth.

Visuals

In-Game Screenshots

Quick peeks at the exact places players ask about most often: starter selection, route traversal, combat, and Sevii Islands.

Starter selection screen in Professor Oak's lab
Picking your starter in Pallet Town. Source: Game8
Route 3 overworld with trainers on the path
Route 3 trainer gauntlet layout. Source: Game8
Gym battle interface showing attack selection
Gym/Elite Four battle UI for move planning. Source: Game8
Sevii Islands ferry map screen
Rainbow Pass ferry menu for Sevii Islands. Source: Game8

Pokédex

All Pokémon · Kanto Dex Completion

Quick-search reference for the 150 core Kanto species plus Sevii exclusives. Encounter data blends Bulbapedia tables with Serebii level bands and Game8 location blurbs.

No. Pokémon Type Primary Locations Notes
#001–#030 · Starters & Early Route Staples
  • #001–#003 Bulbasaur line: Starter from Professor Oak (Pallet Town) or trade from Emerald; evolves at Lv16/32 into Ivysaur/Venusaur. Balanced 80+ defenses and Sleep Powder/Leech Seed make it the safest answer to Brock, Misty, and Koga while resisting poison chip.
  • #004–#006 Charmander line: Fire-type starter found only as your pick; evolves at Lv16/36 into Charmeleon/Charizard. High Speed/Sp. Atk spikes (348 BST by level 36) plus early Metal Claw/Rock Slide coverage let it blow past Erika and late-game Bug/Steel trainers.
  • #007–#009 Squirtle line: Starter option or trade bonus from Celio’s network; evolves at Lv16/36. Huge physical bulk (100 Def as Blastoise) absorbs Surge/Blaine hits, and Rain Dance + Surf beats Lance’s dragons when paired with Ice Beam TM13.
  • #010–#012 Caterpie, Metapod, Butterfree: Viridian Forest (common) and Route 24 (LG). Evolves at Lv7/10, then learns Confusion/Sleep Powder early, giving you a special attacker before Mt. Moon plus Compound Eyes-boosted status for legendary hunts.
  • #013–#015 Weedle, Kakuna, Beedrill: Viridian Forest (FR) or Route 25 grass. Evolutions mirror Caterpie’s timing; Twinneedle arrives at Lv20 for dual-hit Poison damage, though frail 65 Speed means they’re better for VS Seeker farming than gyms.
  • #016–#018 Pidgey line: Routes 1–3 common spawn; evolves at Lv18/36. Solid 91 Speed and FeatherDance make Pidgeot a safe Intimidate-lite pivot for Erika and Sabrina, and Fly HM utility keeps it on most travel squads.
  • #019–#020 Rattata/Raticate: Routes 1–4 ubiquitous; evolves at Lv20. Guts + Hyper Fang offers early-game nukes and HM Cut carrying, though middling defenses relegate it to quick rival wipes.
  • #021–#022 Spearow/Fearow: Route 3/Rock Tunnel entrances. Fearow evolves at Lv20 with 100 Attack/100 Speed and Drill Peck at Lv40, making it the fastest answer to Grass and Fighting routes until you capture Doduo.
  • #023–#024 Ekans/Arbok: FireRed Route 4/8 exclusives. Intimidate access and Glare paralysis make Arbok a great mid-game supporter; it evolves at Lv22 and thrives in Rocket Hideout with Bite/Poison Fang coverage.
  • #025–#026 Pikachu/Raichu: Viridian Forest (5%) and Power Plant (Lv34+) with Light Ball steals. Pikachu evolves via Thunder Stone from Celadon Dept. Store, hitting 100 Speed and Shock Wave access for Misty/Lorelei counters.
  • #027–#028 Sandshrew/Sandslash: FireRed Route 4/8 exclusives. Evolve at Lv22; high Defense and early Dig TM make Sandslash a natural answer to Lt. Surge and Blaine, while Swords Dance tutor (Two Island) gives it late-game sweep potential.
  • #029–#031 Nidoran♀ line: Route 3/9 grass and Safari Zone. Evolves to Nidorina at Lv16 and to Nidoqueen via Moon Stone (Mt. Moon). 90+ bulk plus early Double Kick carry Brock, and Earthquake/Surf TM compatibility gives it elite coverage.
#032–#060 · Mid-Route Evolutions & Gift Staples
  • #032–#034 Nidoran♂ line: Same catch spots as the female line; evolves at Lv16 then Moon Stone into Nidoking. Higher Attack (102) and access to Megahorn/Thunderbolt make it the most versatile sweeper for Rocket Hideout through Victory Road.
  • #035–#036 Clefairy/Clefable: Mt. Moon B2F rare (5%) or Rocket Game Corner prize. Moon Stone evolution; 95 Sp. Atk with Calm Mind + Thunderbolt gives it elite League coverage, and Cute Charm soft resets for Ditto breeding swaps.
  • #037–#038 Vulpix/Ninetales: LeafGreen Route 7/8/24 exclusives. Evolves via Fire Stone; Ninetales’ 100 Sp. Def plus Will-O-Wisp + Confuse Ray loops excels vs. physical bosses like Giovanni.
  • #039–#040 Jigglypuff/Wigglytuff: Route 3 grass (common). Moon Stone evolution yields 140 HP support with Sing + Brick Break; best used as a HM sponge or Doubles disruptor.
  • #041–#042 Zubat/Golbat: Every cave. Evolves at Lv22; Speed + Confuse Ray + Wing Attack make Golbat a reliable Grass killer before Dodrio arrives, and it becomes Crobat post-National Dex if traded.
  • #043–#045 Oddish line: Found nights on Routes 5–15 in LeafGreen; evolves at Lv21 then Leaf Stone into Vileplume. Exceptional Special Attack and Sleep Powder make it Misty/Sabrina insurance; FireRed players grab Bellsprout instead.
  • #046–#047 Paras/Parasect: Mt. Moon/Paras Forest and Safari Zone. Evolves at Lv24; best-in-class Spore + False Swipe capture utility, albeit with severe 4× Fire/Flying weakness.
  • #048–#049 Venonat/Venomoth: Routes 12–15 dusk spawns. Evolves at Lv31; Compound Eyes Sleep Powder plus Silver Wind coverage lets Venomoth delete Psychics in Saffron’s Dojo.
  • #050–#051 Diglett/Dugtrio: Diglett’s Cave (Lv16–31) with a 5% Dugtrio spawn. Evolve at Lv26; Arena Trap + 120 Speed + STAB Dig makes Dugtrio the definitive Lt. Surge counter and late-game revenge killer.
  • #052–#053 Meowth/Persian: LeafGreen Route 5–8 exclusives. Evolves at Lv28; Pay Day cash farming combo with Pickup plus 115 Speed Fake Out, useful before Celadon Game Corner grind.
  • #054–#055 Psyduck/Golduck: Routes 24/25 (LG) or trade. Evolves at Lv33; balanced stats across the board and Calm Mind compatibility give Golduck niche coverage where Starmie is unavailable.
  • #056–#057 Mankey/Primeape: Route 22 (FR) or Sevii rematches. Evolves at Lv28; Early Low Kick and Brick Break answer Brock and Snorlax alike, while 95 Speed ensures outspeed vs. late Rockets.
  • #058–#059 Growlithe/Arcanine: FireRed Route 7/8 exclusives. Fire Stone evolution; Intimidate + ExtremeSpeed with 110 Attack makes Arcanine the premier mixed sweeper for Sabrina/Blaine rematches.
  • #060–#062 Poliwag/Poliwhirl/Poliwrath: Rod encounters on Routes 6, 22, 24. Evolves at Lv25 then Water Stone. Poliwrath’s bulk + Brick Break + Surf fill Fighting/Water slots simultaneously, with Hypnosis for clutch catches.
#063–#090 · Utility Psychics, Rock Walls & Aerial Tools
  • #063–#065 Abra/Kadabra/Alakazam: Routes 24–25 grass (teleporters). Evolves at Lv16 then trade to Alakazam. 135 Special Attack and 120 Speed make it the strongest Sabrina mirror breaker; even Kadabra with Twisted Spoon melts Koga.
  • #066–#068 Machop/Machoke/Machamp: Rock Tunnel and Celadon Dept. Store prize. Evolves at Lv28 then trade; Machamp’s 130 Attack + Cross Chop erases Snorlax and Elite Four Bruno, though low Speed needs Quick Claw.
  • #069–#071 Bellsprout line: FireRed counterpart to Oddish. Evolves at Lv21 then Leaf Stone into Victreebel. Razor Leaf crits and Sleep Powder chain with Wrap to cheese Blaine and Lorelei.
  • #072–#073 Tentacool/Tentacruel: Common Surf encounters Routes 19–21. Evolves at Lv30; 120 Sp. Def walls Lorelei while Toxic + Barrier stalls physical threats.
  • #074–#076 Geodude/Graveler/Golem: Mt. Moon, Rock Tunnel, Sevii caves. Evolves at Lv25 then trade; Sturdy + Earthquake punishes Surge/Blaine, though 4× Water/Grass weakness demands careful swapping.
  • #077–#078 Ponyta/Rapidash: Kindle Road/One Island or Route 17 (LG). Evolves at Lv40; 105 Speed + Flamethrower gives it mid-late Fire coverage if you skipped Charmander/Growlithe.
  • #079–#080 Slowpoke/Slowbro: Route 12 fishing and Seafoam Islands. Evolves at Lv37; mixed bulk + Calm Mind + Surf/Psychic handle Bruno, while Own Tempo blocks confusion from rival Pidgeot.
  • #081–#082 Magnemite/Magneton: Power Plant and Route 10 grass (LG). Evolves at Lv30; only Steel-type available pre-National Dex, boasting 120 Sp. Atk and Thunder Wave to neutralize Lorelei/Lance flyers.
  • #083 Farfetch’d: In-game trade on Route 11 for Spearow. Comes with Cut/Fly for HM support; Onix-level Attack but Swords Dance + Slash can sweep Erika with minimal prep.
  • #084–#085 Doduo/Dodrio: Route 16–18 grass. Evolves at Lv31; Tri Attack STAB and 100+ Speed make Dodrio the best aerial cleaner for Sabrina’s gym puzzle and late biker grinds.
  • #086–#087 Seel/Dewgong: Seafoam Islands + Icefall Cave. Evolves at Lv34; Thick Fat plus Ice Beam handle Lance’s Dragonite, and RestTalk sets absorb Lorelei’s Surf spam.
  • #088–#089 Grimer/Muk: FireRed-exclusive Cinnabar Mansion and Route 16 grass. Evolves at Lv38; 105 HP + Minimize + Sludge Bomb chips Sabrina while Clear Smog support exists post-game.
  • #090–#091 Shellder/Cloyster: Route 12 Super Rod nights. Evolves via Water Stone; Cloyster’s 180 Defense plus Spikes/Icicle Spear (tutor) make it the ultimate physical wall for Elite Four Bruno.
#092–#120 · Ghost Stories, Safari Giants & Casino Rarities
  • #092–#094 Gastly/Haunter/Gengar: Pokémon Tower floors 3–6 (night). Evolves at Lv25 then trade; Levitate + Hypnosis + Thunderbolt sweeps Koga and Lorelei while dodging Ground moves.
  • #095 Onix: Rock Tunnel, Victory Road. Catch rate is low but 160 Defense and Screech support let it wall physical threats until you obtain Steelix through trade-backs.
  • #096–#097 Drowzee/Hypno: Route 11/10 grass. Evolves at Lv26; Insomnia blocks Hypnosis, and Hypno’s 115 Sp. Def handles Koga’s Toxic spam while Reflect supports frailer teammates.
  • #098–#099 Krabby/Kingler: Route 6/25 fishing. Evolves at Lv28; 130 Attack Crabhammer crits delete Blaine’s Arcanine, but poor Sp. Def demands X Special support vs. Lorelei.
  • #100–#101 Voltorb/Electrode: Power Plant + Rocket Hideout scripted. Evolves at Lv30; 140 Speed Light Screen support and Explosion finishers help in double battles and against Snorlax.
  • #102–#103 Exeggcute/Exeggutor: Safari Zone, Berry Forest. Evolves with Leaf Stone; Chlorophyll + Sleep Powder break open Lorelei, and Exeggutor’s 125 Sp. Atk + Psychic/New SolarBeam combos melt Bruno.
  • #104–#105 Cubone/Marowak: Pokémon Tower 5F, Safari Zone. Evolves at Lv28; Thick Club doubles Attack (post-game), but even vanilla Marowak + Bonemerang clears Surge rematches.
  • #106 Hitmonlee / #107 Hitmonchan: Choose one from Saffron Fighting Dojo after beating Karate Master. Hitmonlee brings 120 Attack High Jump Kick, while Hitmonchan’s elemental punches offer late-game coverage.
  • #108 Lickitung: Route 18 trade for Golduck or wild in Sevault Canyon (post-game). 110 HP + Defense Curl/Body Slam support fill a bulky Normal slot when Snorlax is fainted.
  • #109–#110 Koffing/Weezing: Cinnabar Mansion, Fiery Path. Evolves at Lv35; Levitate + Explosion disrupts Sabrina, while Sludge and Toxic stall Lorelei.
  • #111–#112 Rhyhorn/Rhydon: Safari Zone Area 4 + Victory Road. Evolves at Lv42; 130 Attack Earthquake plus Rock Blast handles Lt. Surge rematch and Bird Keepers, though 4× Water/Grass weakness persists.
  • #113 Chansey: Safari Zone Area 3 rare (4%). 250 HP Wish/Softboiled healer with Aromatherapy support; best paired with Calm Minders for Elite Four stamina.
  • #114 Tangela: Route 21 grass patch, Sevii Canyon. High Defense + Sleep Powder + Giga Drain makes it a physical wall for Bruno and Giovanni, though limited movepool hurts.
  • #115 Kangaskhan: Safari Zone Area 1 rare. 95 Speed + Fake Out + Dizzy Punch plus bulk make it top-tier Doubles choice and Rocket Hideout grinder.
  • #116–#117 Horsea/Seadra: Route 19–21 Super Rod. Evolves at Lv32; fast special sweeper with Agility + Surf, evolves to Kingdra via Dragon Scale trade post-game.
  • #118–#119 Goldeen/Seaking: Routes 6, 12 fishing. Evolves at Lv33; best for HM Surf duty with decent Attack (92) and Horn Drill cheese vs. slower bosses.
  • #120–#121 Staryu/Starmie: Safari Zone fishing + Route 24 night. Evolves with Water Stone; 115 Speed + Thunderbolt/Ice Beam coverage makes Starmie the single best Lorelei counter.
#122–#151 · Game Corner Rares, Fossils & Legendaries
  • #122 Mr. Mime: In-game trade on Route 2 (Abra). Barrier + Encore toolkit helps vs. boosting bosses; early Light Screen makes it defensive support for Elite Four.
  • #123 Scyther / #127 Pinsir: Game Corner prizes (Celadon) and Safari Zone exclusives (version dependent). Scyther’s Swords Dance + Wing Attack excels in LeafGreen, while Pinsir’s Submission + Rock Tomb handles Blaine.
  • #124 Jynx: Trade a Poliwhirl in Cerulean for Lola. Dry Skin isn’t present yet, but 95 Sp. Atk + Lovely Kiss + Ice Punch gives unrivaled Lance coverage.
  • #125 Electabuzz: LeafGreen-exclusive Power Plant rare. 105 Speed + Thunderbolt + Cross Chop makes it the premium Electric attacker without trade evolution.
  • #126 Magmar: FireRed-exclusive Mt. Ember overworld. High Special Attack and Flamethrower/ThunderPunch tutor combo answer Lorelei’s Jynx while providing burn support.
  • #128 Tauros: Safari Zone Area 2 rare (4%). Intimidate, 100 Speed, and Return + Earthquake coverage make it the best physical sweeper for the League if you have patience to catch one.
  • #129–#130 Magikarp/Gyarados: Route 4 Pokémon Center vendor or any rod. Evolves at Lv20; Intimidate + Dragon Dance + Surf/Earthquake remains S-tier from Rocket Hideout through post-game Battle Tower.
  • #131 Lapras: Gift from Silph Co. employee after rescuing him. 130 HP, Water/Ice dual STAB, and Shell Armor make it the bulkiest answer to Lance and Bruno simultaneously.
  • #132 Ditto: Routes 13–15 and Cerulean Cave. Essential for breeding (post-National Dex) and Transform scouting; pairs with Pickup teams for held-item farming.
  • #133–#136 Eevee and evolutions: Gift from Celadon Mansion roof (Lv25). Fire Stone = Flareon (130 Attack), Thunder Stone = Jolteon (130 Speed/Spec), Water Stone = Vaporeon (130 HP). Choose based on team gaps.
  • #137 Porygon: Expensive Game Corner prize (9999 coins FR, 6500 LG). Tri Attack + Sharpen sets are gimmicky, but Download-like adaptability plus Recover make it a novelty special tank.
  • #138–#139 Omanyte/Omastar: Take the Helix Fossil from Mt. Moon to Cinnabar Lab post-Silph. Evolves at Lv40; high Defense + Surf + Ice Beam handles Blaine and segments of Victory Road.
  • #140–#141 Kabuto/Kabutops: Dome Fossil counterpart. Evolves at Lv40; 115 Attack + Slash + Rock Slide counters Lorelei’s Lapras and Articuno hunts.
  • #142 Aerodactyl: Revive the Old Amber from Pewter Museum. 130 Speed + Rock Slide + Earthquake is unmatched for clearing Cinnabar Mansion and Elite Four rematches.
  • #143 Snorlax: Two overworld encounters on Routes 12 and 16 (Poké Flute needed). 160 HP + Curse + Body Slam makes it the premier bulky sweeper for the League.
  • #144 Articuno / #145 Zapdos / #146 Moltres: Static legendaries found in Seafoam Islands, Power Plant, and Mt. Ember respectively. Catch at Lv50 with Ultra Balls + Sleep; perfect for covering remaining elemental needs late-game.
  • #147–#149 Dratini/Dragonair/Dragonite: Safari Zone Super Rod (Area 4) or Celadon Game Corner prize. Evolves at Lv30/55; Multiscale isn’t present yet, but Dragon Dance + Outrage + coverage makes Dragonite the best mixed sweeper post-game.
  • #150 Mewtwo: Cerulean Cave B3F after National Dex upgrade. Lv70 with 154 Sp. Atk stats, learns Recover + Calm Mind, trivializing Elite Four rematches.
  • #151 Mew: Event-only (Mystic Ticket/Aurora Ticket); once transferred, it learns every TM/HM, acting as the ultimate utility slot.

Journey

Route Atlas · Kanto 1–25

Scroll or collapse each route entry to surface narrative beats, encounter math, trainer rosters, and every visible/hidden pickup. Rates reflect FireRed/LeafGreen parity sourced from Bulbapedia walkthrough parts 1–4 plus the 2026 Game8 refresh.

Routes 1–8 · 9–15 · 16–18 · 19–21 · 22–25
01

Boulder Badge Route

Pallet Town → Pewter City

  1. Find Professor Oak in Route 1
    Find Professor Oak in Route 1

    Exit your house and find Prof. Oak by trying to go to Route 1. Prof. Oak will stop you from going to Route 1 without a Pokemon.

  2. Select Your Starter Pokemon: Charmander, Squirtle, or Bulbasaur
    Select Your Starter Pokemon: Charmander, Squirtle, or Bulbasaur

    Follow Prof. Oak to his lab where you'll meet your Rival and get to select your starter Pokemon. ▶ Best Starter Pokemon to Choose

  3. Optional ・If you chose Charmander, your rival will choose Squirtle

    ・If you chose Squirtle, your rival will choose Bulbasaur ・If you chose Bulbasaur, your rival will choose Charmander

  4. Have Your First Rival Battle
    Have Your First Rival Battle

    After trying to exit the lab, your Rival will stop you to have your first rival battle.

  5. Head North to Viridian City
    Head North to Viridian City

    Exit Professor Oak's lab and proceed north through Route 1 and go to Viridian City.

  6. Receive Oak's Parcel at the Poke Mart
    Receive Oak's Parcel at the Poke Mart

    Head to the Poke Mart northeast of the Poke Center. The shopkeeper calls you over to receive Oak's Parcel.

  7. Deliver Oak's Parcel and Receive the Pokedex
    Deliver Oak's Parcel and Receive the Pokedex

    Return to Pallet Town and head to Prof. Oak's Lab to bring his parcel. After delivering the parcel, receive the Pokedex from the professor. ▶ Kanto Pokedex Guide

  8. Receive a Town Map from Daisy
    Receive a Town Map from Daisy

    Head to the house north of the lab. Talk to Daisy to obtain a Town Map.

  9. Face Your Rival Again in Route 22
    Face Your Rival Again in Route 22

    Travel back north to Viridian City and head west to Route 22. Face off your rival in another battle.

  10. Learn How to Catch Pokemon from the Old Man
    Learn How to Catch Pokemon from the Old Man

    Go back to Viridian City and head north. Meet with an old man who will teach you how to catch Pokemon.

  11. Head North to the Viridian Forest
    Head North to the Viridian Forest

    Continue to proceed north through Route 2 and head to the gate to enter the Viridian Forest.

  12. Exit the Viridian Forest
    Exit the Viridian Forest

    Exit the Viridian Forest by going east, then north, and then west to reach the gate. Proceed to Pewter City.

  13. Challenge the Pewter City Gym
    Challenge the Pewter City Gym

    Enter the Pewter City Gym and challenge Brock, who will bring out two Rock-type Pokemon, with levels ranging from 12-14. Defeat them to receive the Boulder Badge. ▶ How to Beat Brock

02

Cascade Badge Route

Pewter City → Cerulean

  1. Enter Mt. Moon
    Enter Mt. Moon

    Traverse Route 3 after exiting Pewter City and head west then north to lead you to Mt. Moon. Enter Mt. Moon and climb the various ladders until you reach the area of the fossils. Pick between the Dome Fossil ( Kabuto) or Helix Fossil ( Omanyte) and then use the last ladder to exit the cave. ▶ Which Fossil Should You Choose?

  2. Go Through Route 4
    Go Through Route 4

    After exiting Mt. Moon, follow the yellow path to the east until you see some water. This takes you to Cerulean City.

  3. Pass The Nugget Bridge
    Pass The Nugget Bridge

    Head north to get to the Nugget Bridge, where you'll face off against your Rival. You'll get the Fame Checker from your Rival after the battle. Head to the Nugget Bridge and face off against the other trainers to level up your Pokemon before the gym battle.

  4. Fight Through Route 25
    Fight Through Route 25

    After crossing the bridge, head east to Route 25 to fight even more trainers. Keep going and you'll arrive at the house of Bill, where you'll get the S.S. Ticket.

  5. Enter The Gym
    Enter The Gym

    Go back to Cerulean City and enter the gym. You can fight the other trainers inside, or avoid them by using the other paths in the gym.

  6. Face Off Against Misty
    Face Off Against Misty

    At the very end of the gym, you'll face Misty. Misty has a Staryu and a Starmie, with levels ranging from Lvl. 18-21. Use Grass-type or Electric-type Pokemon for this fight.

  7. Collect the Cascade Badge
    Collect the Cascade Badge

    Beating Misty gives you the Cascade Badge and also allows you to use the HM Cut outside of battle. ▶ How to Beat Misty

03

Thunder Badge Route

Cerulean → Vermilion

  1. Pass the Underground Path in Route 5
    Pass the Underground Path in Route 5

    Head south from Cerulean City to enter Route 5. Head south again and enter the small building to descend into the Underground Path. Go through the Underground Path to reach Route 6.

  2. Head South to Reach Vermilion City
    Head South to Reach Vermilion City

    Head south from Route 6 to reach Vermilion City. Some trainers cannot be avoided and must be battled along the way.

  3. Get a Bicycle (Optional)
    Optional Get a Bicycle (Optional)

    Go inside the Pokemon Fan Club located north of the Vermilion Gym. Talk to the Fan Club Chairman to get a Bike Voucher. You can exchange this voucher in the Bike Shop in Cerulean City. ▶ How to Get the Bike

  4. Board the S.S. Anne
    Board the S.S. Anne

    Head south of Vermilion City to reach the harbor and talk to the Sailor to board the S.S. Anne. You can challenge the various trainers in their rooms for EXP.

  5. Get the HM for Cut From the Captain
    Get the HM for Cut From the Captain

    Go up a level and head to the opposite side of the floor. Defeat your rival near the stairs to the Captain's room. Talk to the Captain to receive the Hidden Machine for Cut.

  6. Catch a Ground Type Pokemon in Diglett's Cave (Optional)
    Catch a Ground Type Pokemon in Diglett's Cave (Optional)

    Go east from Vermilion City to briefly enter Route 11 and then enter the nearby cave. The cave will have wild Digletts and Dugtrios. You can catch one to make the upcoming battle with Lt. Surge easier.

  7. Use Cut to Enter the Vermilion Gym
    Use Cut to Enter the Vermilion Gym

    Teach Cut to one of your Pokemons and use it on the small tree blocking the way to the gym. Enter the gym.

  8. Look for Two Switches in the Cans
    Look for Two Switches in the Cans

    There will be two switches in the cans in the gym. The first switch's location is completely random. However, the second switch can always be found beside the first switch.

  9. Defeat Lt. Surge
    Defeat Lt. Surge

    Lt. Surge's team consists of Voltorb, Pikachu, and Raichu, with their levels ranging from 18 to 24. It is recommended to use Ground-type Pokemons against his team. ▶ How to Beat Lt. Surge

  10. Head back to Cerulean City
    Head back to Cerulean City

    After defeating Lt. Surge, you will have to backtrack all the way to Cerulean City's rightmost route, then cut the tree blocking the way into Route 9, allowing you to reach Route 10 by heading rightwards.

04

Rainbow Badge Route

Lavender ↔ Celadon

  1. Head Into the Rock Tunnel
    Head Into the Rock Tunnel

    From Route 10, head to the Rock Tunnel on the left of the nearby Pokemon Center and explore the cave system by defeating the trainers inside to help you find the exit. Make sure to have a Pokemon that has Flash before entering to make this cave easier to explore, then use Repels if you want to minimize Pokemon encounters in it. ▶ Best HM Pokemon

  2. Head to Lavender Town
    Head to Lavender Town

    After exiting the cave, you will reach Lavender Town directly from Route 10's opposite terminus. You can explore the town or heal up and buy items through the Pokemon Center and Pokemon Store.

  3. Go to Pokemon Tower's 2nd Floor
    Go to Pokemon Tower's 2nd Floor

    You can then head to Lavender Town's Pokemon Tower. Head to the 2nd floor to fight your Rival and leave the Tower immedaitely after, as you cannot explore the other floors till you have a Silph Scope.

  4. Exit Lavender Town via Route 8
    Exit Lavender Town via Route 8

    Head left from Lavender Town to Reach Route 8 to continue your progress. This path is mostly linear as you will only continue left until you reach the route's endpoint.

  5. Head to the Underground Tunnel
    Head to the Underground Tunnel

    Go to the door near a Super Nerd NPC to enter the Underground Tunnel then exit the long tunnel by reaching the other side, allowing you to reach Route 7. Head north of Route 7 to find some paved road, then follow it to reach the next area.

  6. Explore Celadon City (Optional)
    Explore Celadon City (Optional)

    You will reach Celadon City shortly, where you can explore most of the houses and other points of interest in the area. We advise heading to Celadon Department Store in the center of the city to buy TMs and items. When you are done exploring, hit the Celadon Game Corner next, as your next objective will be there.

  7. Get the Tea in Celadon Mansion
    Optional Get the Tea in Celadon Mansion

    Proceed to the Celadon Mansion, east of the department store to receive the item, Tea from an elderly woman. Giving this to any of the gate guards in Routes 5-8 will allow you access to Saffron City later on. ▶ How to Get Tea: Drink for Thirsty Guards

  8. Enter Team Rocket's Hideout
    Enter Team Rocket's Hideout

    Go to Celadon Game Corner to find the entrance of the Team Rocket Hideout to the right, fight the Grunt guarding a Rocket Poster switch and press it to enter the different floors of the building.

  9. Sweep Team Rocket's Hideout
    Sweep Team Rocket's Hideout

    Sweep all Team Rocket grunts and collect items as you go into the Hideout. Follow the position of the Grunts you defeated to get through the different areas until your reach the Team Rocket boss, Giovanni.

  10. Defeat Giovanni and Exit the Hideout
    Defeat Giovanni and Exit the Hideout

    Defeat Giovanni's Pokemon to finish this section, and you can either exit the way you came, or use an Escape Rope to reach the surface again. Don't forget to collect the Silph Scope after the fight!

  11. Prepare for the Gym Fight (Optional)
    Prepare for the Gym Fight (Optional)

    After defeating Giovanni, you can continue to level up your Pokemon or explore Celadon City if you haven't done so yet. Make sure your Pokemon are healed too before proceeding.

  12. Head South of Celadon City
    Head South of Celadon City

    Go to the southern area of Celadon City and Cut down the tree blocking the rightmost path near some fences. Continue cutting trees along the southern path to reach Celadon City Gym.

  13. Enter the Gym and FIght the Trainers
    Enter the Gym and FIght the Trainers

    Enter Celadon City Gym, a Grass-Type specialty Gym and defeat the trainers there. We advise carrying at least one or two Fire-type Pokemon that has Fire moves to make the fights easier.

  14. Defeat Erika and Get the Badge
    Defeat Erika and Get the Badge

    Continue defeating the different Trainers inside the Gym until you face Erika, the Gym Leader, herself. She will be using Grass-types primarily against you so it is adviseable to have Fire-type Pokemon in this fight. Finish the duel to claim your Fourth badge, the Rainbow Badge and get TM19: Giga Drain. ▶ How to Beat Erika

05

Soul Badge Route

Lavender → Fuchsia

  1. Enter the Pokemon Tower Again
    Enter the Pokemon Tower Again

    After the fight with Erika, backtrack via Route 8 into the Pokemon Tower at the northeastern end of Lavender Town. Make sure you collected the Silph Scope that Giovanni dropped in Team Rocket's Hideout before proceeding.

  2. Make Your Way to the 6th Floor
    Make Your Way to the 6th Floor

    Continue exploring the upper floors of the Tower until you reach the 6th floor. The Silph Scope allows you to properly combat the Ghost-type Pokemon in the area as they won't force you to just Run anymore. The Channelers in the area primarily use Gastly from Lv. 22-24, so you can use Dark-type moves to defeat them easily.

  3. Defeat the Ghost Marowak
    Defeat the Ghost Marowak

    Once you reach the stairs leading to the 7th floor, your Silph Scope will reveal a Level 30 Ghost Marowak that was initially blocking the entrance. Defeat it to free the Marowak's soul and your way upstairs.

  4. Save Mr. Fuji
    Save Mr. Fuji

    There will be 3 Team Rocket Grunts blocking the way to Mr. Fuji. Their Pokemon mainly consists of Poison and Psychic types from Lv. 23-26, so prepare accordingly.

  5. Get the Poké Flute
    Get the Poké Flute

    Speak to Mr. Fuji again at his house to get the Poké Flute, which will allow you to wake up the two Snorlax blocking the way to other routes.

  6. Go through Route 12
    Go through Route 12

    Leave Mr. Fuji's house and head south of Lavender Town to reach Route 12. You can use the Poké Flute to wake up the Snorlax blocking the way forward. You can battle the trainers along the bridge to gain more EXP!

  7. Go through Route 13
    Go through Route 13

    You'll eventually arrive at Route 13. Make your way through the fence maze while defeating the many trainers along the way to reach the next area.

  8. Arrive at Fuchsia City
    Arrive at Fuchsia City

    Continue heading west through Route 14 and Route 15 to reach Fucshia City.

  9. Explore the Safari Zone (Optional)
    Explore the Safari Zone (Optional)

    You can explore the Safari Zone at the northern area of Fucshia City to catch more Pokemon and obtain valuable items and TMs! The Gold Teeth item can also be found here. Give it to the Safari Zone Warden to get HM04: Strength! ▶ Safari Zone Guide

  10. Explore Route 17 and 16 (Optional)
    Explore Route 17 and 16 (Optional)

    To gain more EXP, you can also head west from Fucshia City to battle the trainers at Route 17 and Route 16. You'll need to use a Bicycle in Route 17 to traverse the area easily. ▶ How to Get the Bike

  11. Enter the Fucshia Gym
    Enter the Fucshia Gym

    Once you're ready, enter the Fucshia Gym at the southwest area of Fuchsia City. You'll need to go through the invisible maze inside to reach the Gym Leader. You can follow the general direction of the other trainers in the gym to reach the middle. They'll mainly have Poison and Psychic Pokemon from Lv. 31-34.

  12. Defeat Gym Leader Koga
    Defeat Gym Leader Koga

    Defeat Koga to obtain the Soul Badge and TM06: Toxic. You must then head to Saffron City afterwards for your next gym. Koga's team is comprised of Poison Pokemon from Lv. 37-43. ▶ How to Beat Koga

06

Marsh Badge Route

Saffron City Siege

  1. Go to Saffron City
    Go to Saffron City

    Head into Saffron City with the Tea Key Item from the woman in Celadon Mansion, which the guard will take in exchange for letting you through.

  2. Find and Enter Silph Co.
    Find and Enter Silph Co.

    Head to the center of Saffron City to find the Silph Co. building, and head inside. Make your way to the elevator.

  3. Head to the 5th Floor
    Head to the 5th Floor

    Go to the 5th Floor. From the elevator, head west, then south until you see a warp tile. Step on it to be sent to the 9th Floor, and then reuse the warp tile to be sent back to the 5th floor.

  4. Locate the Card Key
    Locate the Card Key

    You will now be standing on the 5th Floor warp tile. Continue to head south and go east to find the Card Key item.

  5. Head to the 3rd Floor
    Head to the 3rd Floor

    The Card Key will allow you to open the locked doors in the building. Head to the 3rd Floor, and from the elevator, go directly south then west into the first room you see.

  6. Defeat Your Rival
    Defeat Your Rival

    Step on the warp tile here to be brought to the 7th Floor for a Rival battle. Win the fight to continue through the building. Your Rival has continued to strengthen his team, fighting with 5 Pokemon at Level 35-40.

  7. Find and Defeat Giovanni
    Find and Defeat Giovanni

    Use the other warp tile after defeating your Rival to reach the 11th Floor. Then, head South and East to find a room with Giovanni in it. Defeat him to clear the building and obtain the Master Ball. Giovanni fights with mainly Ground types, with their levels at 35-41.

  8. Prep for Saffron City Gym
    Prep for Saffron City Gym

    With Giovanni defeated, you can now challenge the Saffron City Gym. It is a Psychic type gym, so Dark and Ghost types are recommended.

  9. Reach the Gym Leader
    Reach the Gym Leader

    The Gym uses warp tiles similar to those in the Silph Co. building. To get to the gym leader, take the following tiles: 1\. East (Entrance) 2\. Northeast 3\. Northwest 4\. Southwest 5\. Southwest (Sabrina)

  10. Defeat Sabrina
    Defeat Sabrina

    Take on the gym leader Sabrina to claim the Marshbadge, as well as TM04: Calm Mind. Her team consists of Level 37-38 Psychic-types, with her ace being a higher-level Alakazam. ▶ How to Beat Sabrina

07

Volcano Badge Route

Pallet Surf → Cinnabar

  1. Head South Towards Cinnabar Island
    Head South Towards Cinnabar Island

    After defeating Gym Leader Sabrina, head to the southwest area of Pallet Town and use Surf on the water. ▶ Pallet Town Guide

  2. Train in the Water (Optional)
    Train in the Water (Optional)

    Make your way down to Cinnabar Island and defeat the trainers stationed in the area for EXP. You may also capture Water-type Pokemon in this route.

  3. Arrive at Cinnabar Island
    Arrive at Cinnabar Island

    In Cinnabar Island, the Pokemon Gym will be locked. Look for the key in the Pokemon Mansion. ▶ Cinnabar Island Guide

  4. Explore the Pokemon Mansion
    Explore the Pokemon Mansion

    The Secret Key to the Gym is found in the basement. It is located at the deepest level after activating the statue switches. The Mansion contains a lot of valuable items and trainers for EXP, so we suggest thoroughly exploring the area! ▶ Pokemon Mansion Guide

  5. The Mansion contains a lot of valuable items and trainers for EXP, so we suggest thoroughly exploring the area!
    Optional The Mansion contains a lot of valuable items and trainers for EXP, so we suggest thoroughly exploring the area!

    ▶ EXP Farming Guide ▶ Pokemon Mansion Guide

  6. Capture Articuno in the Seafoam Islands (Optional)
    Capture Articuno in the Seafoam Islands (Optional)

    To the right of Cinnabar Island, you can solve the Boulder Puzzle with Strength to reach Articuno in the deepest section of the Seafoam Islands. ▶ Seafoam Islands Guide

  7. Enter the Seventh Gym
    Enter the Seventh Gym

    The gym is now accessible with the Secret Key. Answer the quizzes correctly to avoid fighting the extra gym trainers. All Answers, in order: 1\. YES (Caterpie) 2\. NO (Gym Badges) 3\. NO (Poliwag) 4\. NO (Electric) 5\. YES (Identical Pokemon) 6\. NO (TM28)

  8. Defeat Blaine in the Last Room
    Defeat Blaine in the Last Room

    Blaine's roster features four Fire-type Pokemon ranging from Lvl. 40-47. Use Water-type Pokemon and prepare Burn Heals for this fight. If you lack Water-type Pokemon, Route 20 and 21 features good Pokemon you can capture like Tentacruel. ▶ How to Beat Blaine

  9. If you lack Water-type Pokemon, **Route 20 and 21** features good Pokemon you can capture like Tentacruel.
    Optional If you lack Water-type Pokemon, **Route 20 and 21** features good Pokemon you can capture like Tentacruel.
08

Earth Badge Route

Sevii detour & Viridian

  1. Exit the Cinnabar Gym

    Exit the Cinnabar Gym and meet Bill waiting for you at the door. He will then take you to One Island.

  2. Get the Meteorite and Tri-Pass

    Get the Meteorite and Tri-Pass from Bill after the conversation on One Island.

  3. Explore Treasure Beach (Optional)

    Use Surf and follow the sea south of One Island to arrive in Treasure Beach. You can get two Ultra Balls using an Item Finder.

  4. Explore Kindle Road (Optional)

    Use Surf and follow the sea east of One Island to arrive in Kindle Road. Fight a bunch of Trainers for XP and get items protected by breakable rocks! Restore your Pokemon's health via the Ember Spa inside the cave north of Kindle Road.

  5. Explore Mt. Ember (Optional)

    Using Surf again, follow the sea north of Kindle Road to arrive at the entrance of Mt. Ember. This is where you'll be able to encounter the legendary Pokemon Moltres so catch it if you can!

  6. Go to Two Island

    Using the Tri-Pass given by Bill, talk to the sailor at the Ferry port of One Island. This will take you to Two Island!

  7. Go to the Game Corner

    Upon arriving, take time to heal up your Pokemon via the Pokemon Center. Then, head east to find the Game Corner. Upon arriving, you'll learn that a man is looking for Lostelle.

  8. Go to Three Island

    To find Lostelle, follow the biker to Three Island. Go back to the Ferry port and choose Three Island from the choices.

  9. Battle the Bikers North of Three Island

    Upon arriving in Three Island, travel north to see people surrounded by a bunch of bikers. Fight the bikers to pass through! Note that you'll need to fight four Bikers in succession, so be ready!

  10. Find Lostelle in the Berry Forest

    After driving the Bikers away, go to the Berry Forest west of Three Island, past the wooden bridge. You'll find Lostelle protected by a Hypno so be ready to fight!

  11. Give the Meteorite to Lostelle's Father

    After finding Lostelle, give the Meteorite to Lostelle's father as intended by Bill originally. He will then give you a Moon Stone as a reward.

  12. Go Back to One Island and Talk to Bill

    Return to One Island and talk to Bill again. Exit the premises to return to Cinnabar Island.

  13. Go to the Power Plant (Optional)

    At this point, you are now strong enough to take on the mysteries of the Power Plant near Rock Tunnel in Route 10. Use Surf until you reach the entrance to the Power Plant. This is where you'll be able to encounter the legendary Pokemon Zapdos so catch it if you can!

  14. Face the 8th Gym Leader

    After the entire Sevii Island saga, the old man previously blocking the entrance to the Viridian City Gym will move aside and let you know that the Gym Leader is back! Challenge the 8th Gym Leader to get your final badge before going to Victory Road! ▶ How to Beat the 8th Gym Leader

09

Victory Road Checklist

Route 22/23 → Indigo Plateau

  1. Pick Up the Hidden Macho Brace

    After Giovanni leaves the Gym, use the Itemfinder and pick up the hidden Macho Brace on the ground.

  2. Defeat Your Rival

    Leave Viridian City Gym. Heal at the Pokemon Center and go west to Route 22. Upon reaching the area above the first set of grass, your Rival will challenge you to a battle. The Rival's team will always have Pidgeot, Alakazam, and Rhyhorn. The final three will vary depending on the starter you chose. The final three Pokemon will include two of Growlithe, Exeggcute, and Gyarados, and then a fully-evolved starter replacing the Pokemon of similar type among these three.

  3. Heal and Go to Route 22

    Heal at the Pokemon Center again if necessary, then return west and go through Route 22. Enter the building at the end of the route.

  4. Proceed Through the Badge Checks

    Move forward and enter Route 23 after passing the Boulder Badge check.

  5. Use Surf to Proceed

    Proceed along Route 23, going through multiple badge checks. After the Rainbow Badge check, you will need Surf to proceed.

  6. Enter Victory Road

    The entrance to Victory Road will be located after the Earth Badge check.

  7. Push the First Boulder

    Go west and move on top of the boulder. Use Strength to move the boulder down one space, then all the way east, north, and east. Push the boulder to the white button tile nearby.

  8. Return west and go up the stairs to the now-open passageway. Defeat the Cooltrainer here, then go east when you reach the fork in the road and proceed through the path.
  9. Collect TM02: Dragon Claw

    First, collect the hidden Full Restore on the section to the north of the boulder. Then, use Strength to push the boulder west, then collect TM02: Dragon Claw

  10. Optional The other item is a **Rare Candy**; to collect it, exit and re-enter this room to reset the boulder's position, then use **Strength** to push the boulder west and then north.
  11. Defeat Cooltrainer and Proceed

    Return back to the fork in the road and head west this time, defeating a Cooltrainer along the way and going up the ladder.

  12. Push the Second Boulder

    Go south and push the boulder to the white button in the southwest area. Then go up the nearby stairs and defeat the Black Belt and the Juggler.

  13. Collect TM37: Sandstorm

    Go down the stairs and collect TM37: Sandstorm by going west, and then north. Then, go south, east, west, and north to battle a Tamer and pick up the nearby Full Heal.

  14. Collect TM07: Hail

    Go north and east to collect TM07: Hail guarded by a Juggler. Return to the Tamer and go up the ladder.

  15. Optional From here, you can go north, east, and south to pick up the **Max Revive** guarded by a **Cooltrainer**.
  16. Collect TM50: Overheat

    Go north, then all the way west, and south to pick up TM50: Overheat. Then go north and west to the nearby ladder.

  17. Defeat the Pokemaniac and Get Guard Spec

    Defeat the nearby Pokemaniac, then go east to pick up a Guard Spec. Return back to the ladder and go back to the previous area.

  18. Push the Third Boulder

    Go east until you reach the boulder. Use Strength to push the boulder north two spaces, then all the way west until you hit a wall. Then push the boulder south once, west four times, then south thrice and east once onto the white button tile.

  19. Defeat Cooltrainers Blocking the Way

    Return east towards the boulder's initial position. Go south, then west, up the stairs and defeat the Cooltrainer. Proceed through the passage until you go down a flight of stairs and defeat the two Cooltrainers nearby.

  20. Push the Fourth Boulder

    Go all the way east and push the boulder through the hole. Go down the hole, pushing the boulder all the way west towards the white button tile.

  21. Defeat Cooltrainers in a Double Battle

    Go up the nearby stairs, then east through the now-open passageway and up the ladder. Defeat a pair of Cooltrainers here in a double battle, then go north and down a ladder.

  22. Exit Victory Road

    A move tutor teaching Double-Edge is located nearby. Then, go east to exit Victory Road. Proceed north and enter Indigo Plateau.

10

Elite Four & Champion

Pokémon League finale

  1. Heal and Save

    Once you arrive at the Indigo Plateau, heal your Pokemon at the Pokemon Center. This is your last free recovery before facing consecutive battles, so make sure to save your game as well.

  2. Organize Your Party and Stock Up on Items

    Before challenging the Elite Four, organize a balanced team that can cover multiple type matchups. Having strong Water, Electric, Ice, and Psychic Pokemon with Levels 55 - 65 will help deal with most of their teams. Since you cannot leave once you begin, stock up on Full Restores, Max Revives, and Hyper Potions to sustain your party between battles.

  3. Defeat Elite Four Lorelei

    Enter the first chamber to battle Lorelei, whose team primarily consists of Water and Ice-type Pokemon. Electric and Grass-type moves are highly effective here. After defeating Lorelei, you cannot return to the Pokemon Center. Heal your team using items before proceeding to the next room. ▶ How to Beat Lorelei

  4. Defeat Elite Four Bruno

    Next is Bruno, who uses Rock and Fighting-type Pokemon. Psychic and Water-type moves are especially effective against his team. Use your items to restore HP and PP before moving forward. ▶ How to Beat Bruno

  5. Defeat Elite Four Agatha

    Agatha specializes in Ghost and Poison-type Pokemon. Psychic and Dark-type moves work well in this matchup. Heal up again after the battle, as only one member of the Elite Four remains. ▶ How to Beat Agatha

  6. Defeat Elite Four Lance

    The final member is Lance, who uses Dragon and Flying-type Pokemon. Ice-type moves are extremely effective against his Dragonairs and Dragonite, while Electric-type moves are strong against Gyarados and Aerodactyl. After defeating Lance, prepare for one final battle before becoming Champion. ▶ How to Beat Lance

  7. Defeat the Reigning Champion

    In the next room, you will face your Rival, the current Pokemon League Champion. His team composition depends on the starter you chose, but it will be well-balanced and high-level. Adjust your strategy accordingly and defeat him to become the new Champion. After the battle, Prof. Oak will escort you to the Hall of Fame where your team will be registered and the game ends. ▶ How to Beat The Champion

Route 1 · Pallet Plains Unlocked: Start · Level Band: 2–5

Narrative

One-way ledges slow the northbound hike to Viridian, forcing you to weave through grass for your first experience points. Deliver Oak’s Parcel, then boomerang back through this corridor whenever you need a quiet grind or to restock in Viridian.

Wild Pokémon

  • Pidgey · L2–5 · 50% FR / 45% LG — Peck fodder that teaches Gust before Brock.
  • Rattata · L2–4 · 50% FR / 55% LG — Quick Attack at level 7 for early rival duels.

Trainers & Items

  • Trainers: None; ideal for potionless chip experience.
  • Items: Free Potion from the Viridian Poké Mart promoter; signpost reminder about ledges.
  • Tips: Deliver the Parcel before buying Poké Balls; rerun with the VS Seeker to track encounter EVs later.
Route 2 · Viridian Approach Unlocked: Badge 0 · Level Band: 3–7

Narrative

Split into a southern strip before the forest gate and a northern backyard reachable only after Cut. Use it as a staging area for Viridian Forest catches, then revisit post-Surge to farm the tucked-away trainers and loot.

Wild Pokémon

  • Pidgey · L3–5 · 45% — Same spread as Route 1 but higher levels.
  • Rattata · L3–4 · 45% — Quick Attack sweeps early forest bugs.
  • Caterpie (LG) / Weedle (FR) · L3 · 10% — Evolve to Butterfree/Beedrill before Pewter.
  • Nidoran♀/♂ · L3–4 · 30% in the Cut-only backyard — Early double-kick options.

Trainers & Items

  • Post-Cut Trainers: Bug Catcher Rick (Weedle 7, Caterpie 7), Bug Catcher Doug (Weedle 7, Kakuna 7), Lass Janice (Nidoran♀ 9, Nidoran♂ 9).
  • Items: Poké Ball (south strip), Potion (north gate tree), Antidote (forest gate), hidden Rare Candy behind Cut tree.
  • Tips: Teach Cut to a throwaway HM user; the backyard grass has boosted Nidoran rates compared to Route 3.
Route 3 · Pewter Ridge Unlocked: After Boulder Badge · Level Band: 8–14

Narrative

Immediately after Brock, Professor Oak’s aide hands over the Running Shoes and Route 3 unloads eight straight trainer battles before Mt. Moon. Use this gauntlet to shape EV spreads before hitting the cave.

Wild Pokémon

  • Pidgey · L6–7 · 30% — Evolves to Pidgeotto at level 18 for Nugget Bridge.
  • Spearow · L6–8 · 35% — Early Aerial Ace candidate.
  • Nidoran♀/♂ · L6–7 · 15% combined — Pick up double-kick coverage before Mt. Moon’s Geodude.
  • Jigglypuff · L3–7 · 10% — Sing utility for caves; rare but useful.
  • Mankey · L7 · 10% — Great vs. Lenora? (Here: handles Mt. Moon’s Rock/Ground.)

Trainers & Items

  • Lass Janice · Pidgey 9, Pidgey 8 — Watch for Sand-Attack spam.
  • Bug Catcher Colton · Caterpie 10, Weedle 10, Caterpie 10 — Burn antidotes.
  • Youngster Ben · Rattata 11, Ekans 11 — Intimidate lowers Attack; swap special hitters.
  • Bug Catcher Greg · Weedle 9, Caterpie 9, Kakuna 9, Metapod 9.
  • Lass Sally · Rattata 10, Nidoran♀ 10.
  • Youngster Calvin · Spearow 14 — First major crit threat.
  • Bug Catcher James · Caterpie 11, Metapod 11.
  • Lass Robin · Jigglypuff 14 — Sing + Pound attrition.
  • Items: Visible Oran Berry near Youngster Calvin, Persim Berry near Mt. Moon gate, Pokémon Center by the cave entrance.
Route 4 · Mt. Moon Foothills Unlocked: Before & After Mt. Moon · Level Band: 8–20

Narrative

The western half houses the Pokémon Center and Magikarp salesman before you descend into Mt. Moon. After exiting the cave, route 4 bends toward Cerulean with ledges hiding herbs and a TM.

Wild Pokémon

  • Spearow · L8–12 · 35% — Good Attack stat for upcoming rival fight.
  • Rattata · L8–10 · 30% — Guts ability for early poisoned sweeps.
  • Sandshrew (FR) / Ekans (LG) · L10–12 · 30% — Sandshrew supplies Dig, Ekans adds Intimidate.
  • Mankey · L10 · 5% — Backup Fighting coverage if you skipped Route 3.

Trainers & Items

  • Picnicker Alicia · Oddish 13, Bellsprout 13 — Both pack Sleep Powder.
  • Picnicker Martha · Clefairy 14 — Encore can lock you into setup moves.
  • Camper Ruben · Spearow 13, Rattata 13.
  • Camper Ethan · Sandshrew 14, Rattata 14.
  • Items: TM05 Roar near the ledges, hidden Persim Berry among the boulders, repeated access to the Magikarp vendor inside the Pokémon Center.
Route 5 · Cerulean Downs & Underground Path Unlocked: After Cascade Badge · Level Band: 13–19

Narrative

A short slope leading to the first Underground Path. Cerulean’s Day-Care couple sits at the north end; southbound travelers either cut the guard line with a Bike voucher later or push straight toward Vermilion.

Wild Pokémon

  • Pidgey · L13–15 · 30% — Evolves soon into Pidgeotto.
  • Oddish (LG) / Bellsprout (FR) · L13–16 · 35% — Expose Misty’s Starmie weakness if you skipped catching one earlier.
  • Meowth (LG) / Mankey (FR) · L10–16 · 25% — Pickup farming or Fighting coverage.
  • Pidgeotto · L15 · 5% — Rare but immediate Flying utility.

Trainers & Items

  • Trainer roster: None on the overworld, but the Day-Care NPC can raise one Pokémon to match your walking steps.
  • Items: Hidden Sitrus Berry patch near the guardhouse, Underground Path has repeatable hidden items (Repel recommended).
  • Tips: Use the Day-Care for early friendship evolutions (Eevee → Espeon via tradeback) and to offload HM mules while cycling VS Seeker routes elsewhere.
Route 6 · Cerulean Meadows Unlocked: After Underground Path · Level Band: 13–20

Narrative

Six trainers crowd the central lawn before Vermilion. Clear them en route to the S.S. Anne, then revisit with the VS Seeker to farm cash before Surge.

Wild Pokémon

  • Pidgey/Pidgeotto · L13–17 · 35% — Round out Flying coverage.
  • Oddish (LG) / Bellsprout (FR) · L13–17 · 35% — Sleep Powder support.
  • Meowth (LG) / Mankey (FR) · L10–16 · 15% — Payday or Low Kick utility.
  • Abra · L10 · 10% — Teleports instantly; chuck a Great Ball.

Trainers & Items

  • Camper Ricky · Squirtle 20 — Withdraw stall, watch for Water Gun.
  • Picnicker Nancy · Rattata 16, Pikachu 16.
  • Bug Catcher Elijah · Butterfree 20 — Confusion + Stun Spore combo.
  • Camper Jeff · Sandshrew 16, Bellsprout 16.
  • Picnicker Isabelle · Pidgey 16, Pidgey 16.
  • Gentleman Brooks · Growlithe 18, Growlithe 18.
  • Items: Hidden Chesto Berry near the southern pond; guardhouse leads into Vermilion.
Route 7 · Celadon Fringe Unlocked: After Tea delivery · Level Band: 18–24

Narrative

A tiny strip between Saffron and Celadon. It connects to the Underground Path running to Route 8 and hosts a high-quality grass patch with Fire-type exclusives depending on version.

Wild Pokémon

  • Growlithe (FR) / Vulpix (LG) · L18–20 · 35% — First reliable Fire coverage.
  • Pidgeotto · L19–22 · 25% — Intimidate substitute when Fearow faints.
  • Oddish (LG) / Bellsprout (FR) · L18–20 · 25% — Sleep support for Rocket Hideout.
  • Abra · L18 · 10% — Pre-Saffron Kadabra if you missed Route 24.

Trainers & Items

  • Trainers: None; Rocket blockade sits inside Saffron instead.
  • Items: Hidden Rare Candy near the Underground Path entrance.
  • Tips: Catch Vulpix/Growlithe now so you can evolve immediately after Celadon Department Store delivers Fire Stones.
Route 8 · East Saffron Causeway Unlocked: After Rock Tunnel · Level Band: 20–27

Narrative

Gamblers and Super Nerds line the path between Lavender and Celadon. Until you deliver Tea, the central guardhouse is blocked, forcing you to use the Underground Path.

Wild Pokémon

  • Pidgeotto · L20–22 · 25% — Reliable Fly user.
  • Growlithe/Vulpix · L20–22 · 25% — Maintain Fire coverage if Route 7 stingy.
  • Ekans (LG) / Sandshrew (FR) · L20–22 · 25% — Poison/Ground utility.
  • Kadabra · L20 · 10% — Catch evolved form directly.

Trainers & Items

  • Gambler Stan · Poliwag 18, Poliwhirl 18.
  • Gambler Rich · Growlithe 18, Vulpix 18.
  • Super Nerd Glenn · Voltorb 22, Koffing 22, Magnemite 22, Voltorb 22.
  • Lass Julia · Pidgey 24, Pidgeotto 24.
  • Lass Andrea · Meowth 24 ×3.
  • Engineer Bernie · Magnemite 21, Magneton 21.
  • Items: Vs. Seeker here yields huge cash; hidden PP Up tucked near the path fence.
Route 9 · Rock Tunnel Approach Unlocked: After Cut + Lt. Surge · Level Band: 18–25

Narrative

Cut the tree east of Cerulean to access this canyon loaded with campers, hikers, and pokémaniac duos. It feeds directly into Rock Tunnel.

Wild Pokémon

  • Spearow/Fearow · L17–19 · 35% — Intimidate alternative.
  • Ekans (LG) / Sandshrew (FR) · L17–19 · 30% — Poison/Ground core for Surge rematch.
  • Nidorina/Nidorino · L19–20 · 20% — Saves Moon Stones for Clefairy.
  • Primeape · L25 (rare) — Late catch if earlier Mankey fainted.

Trainers & Items

  • Hiker Brice · Geodude 21 ×3.
  • Hiker Alan · Geodude 19, Onix 19.
  • Hiker Eric · Geodude 21, Graveler 21.
  • Picnicker Heidi · Clefairy 20, Clefairy 20.
  • Picnicker Sophia · Pidgey 22, Meowth 22.
  • Camper Chris · Sandshrew 20, Sandslash 20.
  • Pokémaniac Mark · Cubone 20, Slowpoke 20.
  • Items: TM40 Aerial Ace near the river bend, hidden Leppa Berry on the plateau.
Route 10 · Rock Tunnel North & Power Plant Fork Unlocked: Via Route 9 · Level Band: 17–26

Narrative

The Pokémon Center outside Rock Tunnel doubles as a Magneton/Voltorb hunting ground. Later, Surf south to reach the Power Plant for Zapdos.

Wild Pokémon

  • Voltorb · L14–22 · 35% — Fast electric support.
  • Magnemite · L14–18 · 25% — Steel typing walls Koga.
  • Spearow/Fearow · L17–20 · 20% — Fly HM candidates.
  • Ekans/Sandshrew · L17–20 · 15% — Additional Ground options.
  • Electabuzz (LG) / Magmar (FR) · L34 (Power Plant only) — Post-Surf catch.

Trainers & Items

  • Pokémaniac Ashton · Slowpoke 25 ×2.
  • Pokémaniac Herman · Cubone 24, Slowpoke 24.
  • Hiker Clark · Geodude 20, Graveler 20, Machop 20.
  • Hiker Trent · Geodude 21, Onix 21.
  • Items: Revive south of the Pokémon Center, hidden Max Ether near Power Plant fork.
Route 11 · Diglett’s Junction Unlocked: After Lt. Surge · Level Band: 14–24

Narrative

Connects Vermilion to the eastern guardhouse and houses the Diglett’s Cave entrance. Snorlax blocks the south exit until you grab the Poké Flute.

Wild Pokémon

  • Drowzee · L9–17 · 40% — Hypnosis support before Sabrina.
  • Spearow · L13–17 · 35% — Fly HM user.
  • Ekans (LG) / Sandshrew (FR) · L12–15 · 20% — Additional Poison/Ground utility.
  • Snorlax · L30 (static) — Poké Flute encounter.

Trainers & Items

  • Engineer Baily · Magnemite 21 ×2.
  • Engineer Braxton · Magnemite 18, Magneton 18.
  • Gambler Darian · Voltorb 18, Voltorb 18.
  • Gambler Hugo · Growlithe 18, Vulpix 18.
  • Youngster Johnson · Sandshrew 17, Ekans 17.
  • Youngster Dave · Nidoran♂ 17, Nidorino 17.
  • Items: X Accuracy near Diglett’s Cave, hidden Awakening by tall grass.
  • Tips: Run Diglett’s Cave to collect HM05 Flash before Rock Tunnel.
Route 12 · Silence Bridge Unlocked: After Poké Flute · Level Band: 22–32

Narrative

Long fishing pier stacked with Fishermen and Cue Balls. Hosts the southern Snorlax and grants the Super Rod halfway down.

Wild Pokémon

  • Water (Super Rod) · Goldeen/Seaking, Tentacool, Gyarados 15–35.
  • Grass patches · Venonat, Pidgeotto, Oddish/Bellsprout 22–28.
  • Static Snorlax · L30 — second chance if Route 11 KO’d it.

Trainers & Items

  • Fisherman Ned · Goldeen 24 ×3.
  • Fisherman Chip · Shellder 27, Cloyster 27.
  • Fisherman Hank · Magikarp 24 ×3.
  • Fisherman Elliot · Seaking 28, Goldeen 28.
  • Camper Justin · Raticate 29, Raticate 29.
  • Items: Super Rod from the house, Calcium near the southern stairs.
Route 13 · Coastal Switchbacks Unlocked: Follow Route 12 south · Level Band: 24–33

Narrative

Fence maze loaded with Bird Keepers and Beauties. Expect double battles and narrow choke points.

Wild Pokémon

  • Pidgeotto/Fearow · L24–28 · 35% — Wing Attack and Drill Peck.
  • Tangela · L24–28 · 5% — Only mainland location for its catch.
  • Ditto · L24–26 · 15% — Breeding utility.
  • Venonat · L22–26 · 20% — Compound Eyes Sleep Powder.

Trainers & Items

  • Bird Keeper Perry · Pidgeotto 26, Fearow 26.
  • Bird Keeper Robert · Fearow 29.
  • Beauty Shelia · Clefairy 24, Clefable 24.
  • Beauty Grace · Rattata 24, Raticate 24, Nidorina 24, Nidoran♀ 24.
  • Twins Joy & Meg · (Double) Nidoran♀ 27, Nidorina 27.
  • Items: Hidden Calcium near the fence corner, visible PP Up along the boardwalk.
Route 14 · Southern Cliffs Unlocked: Continue south from Route 13 · Level Band: 26–34

Narrative

Narrow vertical stretch featuring Bird Keepers and Bike-type trainers before the split toward Route 15.

Wild Pokémon

  • Fearow · L26–29 · 30% — Drill Peck sweeper.
  • Ditto · L24–26 · 20% — Last mainlands catch before Cerulean Cave.
  • Gloom (LG) / Weepinbell (FR) · L26–29 · 25% — Mid-stage Grass catches.

Trainers & Items

  • Bird Keeper Roger · Pidgeotto 29 ×2.
  • Bird Keeper Bryan · Fearow 30, Pidgeotto 30.
  • Biker Ernest · Koffing 29 ×2, Weezing 29.
  • Biker Alex · Grimer 28 ×2, Muk 28.
  • Items: Max Ether hidden along the cliff edge.
Route 15 · Fuchsia Causeway Unlocked: Exit Route 14 west · Level Band: 28–36

Narrative

Final stretch before Fuchsia City. Contains a mandatory double battle and trainers specializing in Normal, Poison, and Grass types.

Wild Pokémon

  • Fearow, Ditto, Oddish/Bellsprout — Similar table to Route 14.
  • Chansey (very rare) — Only accessible via Safari Zone, but trainers reference it here.

Trainers & Items

  • Bird Keeper Edgar · Fearow 29, Doduo 29, Dodrio 29.
  • Beauty Lola · Clefairy 29, Wigglytuff 29.
  • Beauty Sheila · Persian 29, Wigglytuff 29.
  • Twins Eli & Anne (Double) · Clefairy 30, Clefable 30.
  • Biker Virgil · Koffing 29 ×3.
  • Items: TM18 Rain Dance near the guardhouse, hidden PP Up by the tall grass.
Route 16 · Cycling Road Gate Unlocked: After Tea / Cut · Level Band: 25–34

Narrative

West of Celadon, featuring the northern Snorlax, the secret hideout with HM02 Fly, and the entrance to Cycling Road (Routes 17–18).

Wild Pokémon

  • Doduo · L18–22 · 40% — First access to Tri Attack/Drill Peck line.
  • Raticate · L23–25 · 25% — Guts sweeper for Rocket Hideout.
  • Grimer (LG) / Koffing (FR) · L25–27 · 20% — Poison tank.
  • Snorlax · L30 (static) — Use the Poké Flute.

Trainers & Items

  • Trainers: Biker Loiterers inside Cycling Road gate once Snorlax leaves (Koffing/Grimer squads).
  • Items: HM02 Fly from the secret house behind the Cut trees, hidden PP Up behind Snorlax’s perch.
  • Tips: Catch Doduo here to trivialize Erika and Sabrina with Drill Peck.
Route 17 · Cycling Road Unlocked: Bicycle required · Level Band: 25–37

Narrative

Downhill gauntlet filled with Bikers and Cue Balls. The VS Seeker grind spot for cash and EVs.

Wild Pokémon

  • Doduo/Dodrio · L25–29 · 40% — High-level Flying catches.
  • Fearow · L25–29 · 30% — Additional Flying backup.
  • Grimer/Koffing · L25–29 · 20% — Poison tanks.

Trainers & Items

  • Biker Jared · Koffing 29 ×2.
  • Biker Jaxon · Weezing 29, Koffing 29.
  • Biker William · Grimer 28 ×2, Muk 28.
  • Cue Ball Isaiah · Mankey 33, Primeape 33.
  • Cue Ball Jamal · Machop 34, Machoke 34.
  • Items: Leftovers hidden in the northern grass, Rare Candy in central median.
Route 18 · Cycling Road Exit Unlocked: South of Route 17 · Level Band: 27–35

Narrative

Short strip feeding directly into Fuchsia City with three Bird Keepers guarding the gatehouse stairs.

Wild Pokémon

  • Doduo/Dodrio · L24–29 · 45% — Continue catching high-speed Flyers.
  • Fearow · L24–29 · 30% — Alternative if Doduo sparse.

Trainers & Items

  • Bird Keeper Jacob · Fearow 34.
  • Bird Keeper Wilton · Pidgeotto 33, Pidgeot 33.
  • Bird Keeper Ramiro · Spearow 32, Fearow 32.
  • Items: Rare Candy along the cliff edge, guardhouse grants the Exp. Share once you log 50 Pokédex entries.
Route 19 · Fuchsia Surf Unlocked: After Surf · Level Band: 30–38

Narrative

Surf south from Fuchsia toward the Seafoam Islands. Dozens of Swimmers provide experience before Blaine.

Wild Pokémon

  • Tentacool/Tentacruel · L5–40 — Common surf encounters with high Speed.
  • Horsea/Seadra · L30–35 — Good Swift Swim abusers.
  • Lapras (Icefall Cave later) — Not native here but referenced by swimmers.

Trainers & Items

  • Swimmer Tiffany · Seel 30, Dewgong 30.
  • Swimmer Matthew · Tentacool 29, Tentacool 29, Tentacruel 29.
  • Swimmer Nora · Staryu 29, Starmie 29.
  • Cue Ball Thad (shore) · Mankey 31, Primeape 31.
  • Items: Hidden Max Ether on the first sandbar.
Route 20 · Seafoam Islands Channel Unlocked: Continue west from Route 19 · Level Band: 32–40

Narrative

Wraps around the Seafoam Islands; houses more Swimmers and serves as the entry to the Articuno puzzle.

Wild Pokémon

  • Tentacool/Tentacruel · L15–40 — Standard surf pool.
  • Seel/Dewgong · Inside Seafoam cave (L30–38) — Ice STAB for Lance.
  • Articuno · L50 static — Encounter deep inside Seafoam.

Trainers & Items

  • Swimmer Melissa · Seaking 33, Seadra 33.
  • Swimmer Richard · Tentacool 32 ×2, Tentacruel 32.
  • Swimmer Reece · Staryu 33, Starmie 33.
  • Items: Max Revive hidden on the western sandbar, Boulder puzzles inside Seafoam drop boulders to calm currents.
Route 21 · Pallet Coast Unlocked: Surf from Pallet City · Level Band: 30–38

Narrative

Vertical strip south of Pallet that becomes your shortcut after acquiring Surf. Fishermen hug the western shoals while high-level Tentacruel patrol the waters.

Wild Pokémon

  • Tentacool/Tentacruel · L15–40 — Consistent EXP and drops.
  • Horsea/Seadra · L30–35 — Optional Dragon Scale candidate.
  • Staryu/Starmie (LG) / Shellder/Cloyster (FR) — Hooked via Super Rod.

Trainers & Items

  • Fisherman Wade · Tentacool 33 ×2, Tentacruel 33.
  • Fisherman Ronald · Goldeen 29, Seaking 29, Seaking 29.
  • Swimmer Spencer · Seadra 35, Tentacruel 35.
  • Items: Hidden Star Piece on the southern sandbar.
Route 22 · Indigo Spur Unlocked: Early game + Pre-League · Level Band: 3–45

Narrative

Optional rival battle before Brock (levels 9–10) and mandatory rival duel after earning all eight badges. Leads west toward Victory Road.

Wild Pokémon

  • Mankey · L2–5 · 45% (FR) — Charmander insurance.
  • Spearow · L2–5 · 10% — Early Flying type.
  • Rattata · L2–5 · 45% — Same as Route 1.
  • Poliwag/Poliwhirl (Surf) · L25–30 — Later water catches.

Trainers & Items

  • Rival Battle #2 · Pidgey 9 + starter evo line at 9–10, plus new secondary (Raticate/Kadabra, etc.).
  • Rival Battle #7 (pre-League) · Pidgeot 47, Alakazam 47, Rhydon 45, plus three starter-dependent threats (Gyarados/Exeggutor/Arcanine, etc.).
  • Items: Hidden Rare Candy behind the ledges, visible TM43 Secret Power near pond.
Route 23 · Badge Check Arches Unlocked: After 8 badges · Level Band: 40–55

Narrative

A linear march through eight guardhouses verifying each badge before Victory Road. Contains Maximizer items and elite trainers if you run into the grass.

Wild Pokémon

  • Arbok/Sandslash · L38–42 — Late Poison/Ground options.
  • Primeape · L40 — Backfill Fighting coverage.
  • Fearow · L39–44 — Last Flying catch before Victory Road.
  • Poliwag/Slowbro (Surf) · L35–40 — Water support.

Trainers & Items

  • Trainers: None; only badge guards. Use grass for final tweaks.
  • Items: Full Restore, Ultra Ball, Max Revive scattered along the path.
  • Tips: Stock up at Indigo Plateau; there’s no shop inside Victory Road.
Route 24 · Nugget Bridge Unlocked: After Rival #3 · Level Band: 12–19

Narrative

Five back-to-back trainers plus a disguised Rocket recruiter awarding a Nugget. Leads into the grassy platforms north of Cerulean.

Wild Pokémon

  • Oddish (LG) / Bellsprout (FR) · L12–16 · 45%.
  • Abra · L10 · 15% — Teleport risk.
  • Caterpie/Metapod (LG) / Weedle/Kakuna (FR) — Backup Bug catches.

Trainers & Items

  • Bug Catcher Kale · Caterpie 10, Weedle 10.
  • Lass Ali · Pidgey 14, Nidoran♀ 14.
  • Youngster Timmy · Sandshrew 11, Ekans 11.
  • Lass Reli · Nidoran♀ 12, Nidoran♂ 12.
  • Camper Ethan · Mankey 18.
  • Team Rocket Grunt · Ekans 15, Zubat 15.
  • Items: Nugget reward, hidden Rare Candy near the river.
Route 25 · Bill’s Cape Unlocked: After Route 24 · Level Band: 13–20

Narrative

A winding cliffside ending at Bill’s cottage (reward: S.S. Ticket). Packed with trainers guarding each bend.

Wild Pokémon

  • Same pool as Route 24 with slightly higher levels (Oddish/Bellsprout, Abra, Caterpie line).

Trainers & Items

  • Youngster Joey · Rattata 15, Raticate 15.
  • Youngster Dan · Slowpoke 17.
  • Youngster Chad · Ekans 14, Sandshrew 14.
  • Hiker Nob · Geodude 13 ×3, Machop 13.
  • Hiker Wayne · Onix 17.
  • Picnicker Kelsey · Nidoran♀ 16, Nidorina 16.
  • Camper Flint · Rattata 13 ×2, Spearow 13, Ekans 13.
  • Camper Keagan · Growlithe 16, Charmander 16.
  • Items: TM45 Attract near Bill’s house, hidden Ether on the peninsula.

Boss Prep

Gym Lab · Badge-by-badge Strategies

Each card mirrors Bulbapedia gym articles: leader roster, levels, signature moves, suggested counters, common mistakes, and rewards.

Boulder Badge · Brock

Geodude Lv12 (Tackle/Rock Tomb/Defense Curl), Onix Lv14 (Rock Tomb/Bide/Bind/Harden)

  • Strategy: Grass/Water starters win outright; Charmander teams should bring Mankey (Low Kick) or Butterfree with Confusion.
  • Common mistakes: Scratching into Bide, ignoring Sandstorm chip if you overlevel.
  • Rewards: Boulder Badge increases Attack, TM39 Rock Tomb, and the ability to use Flash outside battle.

Cascade Badge · Misty

Staryu Lv18 (Water Pulse/Rapid Spin), Starmie Lv21 (Water Pulse/Swift/Recover)

  • Strategy: Gloom/Bellsprout, Pikachu, or any Shock Wave user. Lead with Sleep Powder to neuter Swift crits.
  • Common mistakes: Leaving Charmander evolved (Charmeleon) without teaching Metal Claw/Orth coverage; Starmie’s Swift ignores evasion.
  • Rewards: Cascade Badge allows Cut, TM03 Water Pulse, boosted traded Pokémon obedience.

Thunder Badge · Lt. Surge

Voltorb Lv21, Pikachu Lv18, Raichu Lv24 (Shock Wave/Double Team/Quick Attack)

  • Strategy: Dugtrio from Diglett’s Cave sweeps with Dig; alternatively Graveler (Rock Throw) or Jolteon with Double Kick.
  • Common mistakes: Forgetting to remove items before Raichu uses Thunder Wave + Double Team loops; use X Accuracy if needed.
  • Rewards: Thunder Badge boosts Speed, TM34 Shock Wave, outside battle Fly once earned.

Rainbow Badge · Erika

Victreebel Lv29, Tangela Lv24, Vileplume Lv29 (Giga Drain/Stun Spore/Acid)

  • Strategy: Teach Aerial Ace to Fearow/Doduo; alternatively Charmeleon/Arcanine with Flamethrower or Kadabra’s Psybeam.
  • Common mistakes: Underestimating Stun Spore + Acid chip; keep a stocked supply of Paralyze Heals.
  • Rewards: Rainbow Badge allows Strength, TM19 Giga Drain, plus Calm Mind vendor unlock upstairs in Celadon.

Soul Badge · Koga

Koffing Lv37, Muk Lv39, Koffing Lv37, Weezing Lv43 (Sludge/Toxic/Explosion)

  • Strategy: Kadabra/Alakazam one-shots, as do Psychic Lapras or Hypno. Bring Pecha/Lum berries and avoid physical contact to skip Poison Point.
  • Common mistakes: Triggering Self-Destruct with low-HP Pokémon; lead with Substitute or Protect to scout.
  • Rewards: Soul Badge enables Surf outside battle, TM06 Toxic, boost to Defense stats.

Marsh Badge · Sabrina

Kadabra Lv38, Mr. Mime Lv37, Venomoth Lv38, Alakazam Lv43 (Calm Mind/Psychic/Recover)

  • Strategy: Snorlax with Shadow Ball/Body Slam, Bite Gyarados, or Swords Dance Scyther (trade). Use X Speed on physical attackers to outrun Alakazam.
  • Common mistakes: Allowing Calm Mind stacks; roar/Encore with Wigglytuff if needed.
  • Rewards: Marsh Badge boosts obedience to Lv70, TM04 Calm Mind, and warp tile practice.

Volcano Badge · Blaine

Growlithe Lv42, Ponyta Lv40, Rapidash Lv42, Arcanine Lv47 (Overheat/Fire Blast/ExtremeSpeed)

  • Strategy: Surf Lapras, Cloyster, or even Dugtrio’s Earthquake. Rain Dance Gyarados shuts down Overheat’s first nuke.
  • Common mistakes: Forgetting to answer Sunny Day + Fire Blast; keep Revives ready if Arcanine outspeeds you.
  • Rewards: Volcano Badge boosts Special Attack, TM38 Fire Blast, opens One Island detour.

Earth Badge · Giovanni

Rhyhorn Lv45, Dugtrio Lv42, Nidoqueen Lv44, Nidoking Lv45, Rhyhorn Lv50 (Earthquake/Poison Sting/Sandstorm)

  • Strategy: Surf from Blastoise/Lapras, Giga Drain Venusaur, or Ice Beam Starmie. Use Intimidate (Gyarados) to cut damage.
  • Common mistakes: Letting Dugtrio crit with Slash; set Reflect/Light Screen first.
  • Rewards: Earth Badge lets you use HM08 Rock Smash (post-game), TM26 Earthquake, and the final badge gate clears.

Dungeons

Major Locations & Side Content

Viridian Forest through Cerulean Cave captured in tidy wiki cards: encounter spreads, trainers, puzzle tricks, and loot.

Viridian Forest

Maze-like bug haven between Routes 2 and Pewter. Good for catching Pikachu (5% spawn) and Butterfree before Brock.

  • Wild: Caterpie/Metapod (LG) or Weedle/Kakuna (FR) Lv3–5, Pikachu Lv3–5 (5%).
  • Trainers: Bug Catcher Doug, Rick, Sammy — all level 7–9 bug squads.
  • Items: Antidotes, hidden Potions, and a Paralyze Heal along the trunks.

Mt. Moon

Three floors of Zubat and fossils. Team Rocket grunts debut here, culminating in the Dome vs. Helix choice.

  • Wild: Zubat, Geodude, Clefairy (rare), Paras, Sandshrew (FR) / Ekans (LG).
  • Trainers: Super Nerd Miguel (fossil duel), Rockets Jessie & James analog, Hikers/Youngsters.
  • Items: Moon Stone ×2, TM46 Thief, Rare Candies, fossils (Kabuto vs. Omanyte).

S.S. Anne

Optional cruise packed with Sailors, Gentlemen, and the second rival battle. Ends with HM01 Cut from the captain.

  • Wild: None, but plenty of items: Hyper Potion, TM31 Brick Break, Great Balls.
  • Trainers: 17 rooms of opponents including Gentleman Thomas (Growlithe/Ponyta) and Sailor Trevor (Machop/Shellder).
  • Tips: Exit after talking to the captain; ship leaves permanently afterward.

Rocket Game Corner Hideout

Four-floor spinner puzzle below Celadon. Ends with Giovanni’s Kangaskhan and the Lift Key.

  • Trainers: Rockets wield Koffing, Zubat, Raticate, Machop lines.
  • Items: Silph Scope, TM21 Frustration, Blackglasses, Moon Stone.
  • Tips: Use spinners to funnel Rockets toward you; bring Escape Rope for quick exit.

Pokémon Tower

Lavender Town’s haunted tower. Grab the Silph Scope to identify the Marowak ghost and rescue Mr. Fuji.

  • Wild: Gastly/Haunter (post-Scope) Lv18–24.
  • Trainers: Channelers (Ghastly lines), Rival battle (Lv25–27).
  • Items: Cleanse Tag, Rare Candy, Nugget, Elixir.

Safari Zone

Fuchsia’s timed capture safari split into four areas. Needed for HM03 Surf and the Warden’s Gold Teeth (HM04 Strength).

  • Wild: Chansey, Kangaskhan, Tauros, Rhyhorn, Dratini (Super Rod in Area 4).
  • Items: HM03 Surf in Area 3 house, Gold Teeth in Area 4, multiple TMs (Steel Wing, Double Team).
  • Tips: Walk 50 steps between throws to conserve timer; use Bait + Rock setups sparingly.

Silph Co.

Eleven-story office siege in Saffron. Warp tiles lead to Rival #6 and Giovanni. Reward: Master Ball.

  • Trainers: Rockets with Golbat, Arbok, Machamp; Scientists with Magnemite/Porygon.
  • Items: Card Key (5F), Lapras gift, TM36 Sludge Bomb, Max Revives, Master Ball.
  • Tips: Path: 5F Card Key → 3F warp → 7F Rival → 11F Giovanni.

Pokémon Mansion

Collapsed research lab on Cinnabar. Solve statue switches, read diaries about Mewtwo, and retrieve the Secret Key for Blaine’s gym.

  • Wild: Raticate, Muk, Weezing, Ponyta, Ditto (post-game).
  • Items: Secret Key, TM14 Blizzard, Carbos, Calcium.
  • Trainers: Burglars and Scientists with Fire/Electric teams.

Seafoam Islands

Labyrinth of currents and boulder puzzles culminating in Articuno.

  • Wild: Seel/Dewgong, Golbat, Slowpoke, Zubat.
  • Items: Ice Heal, Water Stone, Rare Candy, NeverMeltIce.
  • Tips: Push two boulders into each current shaft to calm the flow before reaching Articuno.

Power Plant

Optional detour east of Rock Tunnel accessible after Surf. Home to Zapdos.

  • Wild: Voltorb, Electrode (camouflaged as items), Magnemite, Magneton, Pikachu, Raichu.
  • Items: TM25 Thunder, Max Potion, Rare Candy.
  • Tips: Bring Ground types to absorb Thunderbolt while hunting Zapdos LV50.

Victory Road

Three floors of boulder puzzles packed with Cooltrainers and Ace trainers. Last grind before the Elite Four.

  • Wild: Graveler, Machoke, Onix, Marowak, rare Chansey.
  • Trainers: Cooltrainer Naomi (Victreebel, Vileplume, Parasect), Cooltrainer George (Exeggutor, Cloyster, Arcanine), Ace Trainer Daisey (Nidoqueen, Nidoqueen), etc.
  • Items: TMs 02 Dragon Claw, 37 Sandstorm, 50 Overheat, Rare Candies, Full Restore.

Cerulean Cave (Post-Game)

Unlocked after completing the Sevii Network Machine quest. Houses Mewtwo at Level 70.

  • Wild: Primeape, Kadabra, Ditto, Electrode, Chansey, Raichu, Lickitung (LG)/Wigglytuff (FR).
  • Items: Full Restores, Ultra Balls, Max Elixirs, hidden Nuggets.
  • Tips: Bring Surf + Waterfall + Rock Smash; stock 50+ Ultra Balls for Mewtwo.

Journey

Sevii Islands Field Notes

Bill’s detour plus the post-credits Ruby/Sapphire arc reimagined with Kindle Road grinds, Lostelle rescue, Trainer Tower loops, and legendary hunts.

One Island & Treasure Beach

Bill and Celio’s hub. Access to Treasure Beach (hidden Nuggets) and the Ember Spa for daily massages.

  • Encounters: Ponyta, Meowth, Fearow on the beach; Magikarp via Old Rod.
  • Items: Tri-Pass, Meteorite delivery, Big Pearl farm via Itemfinder.
  • Tips: Ember Spa doubles as a free heal; talk to the Move Tutor for Softboiled later.

Kindle Road & Mt. Ember

Linear gauntlet culminating in the Moltres fight and the Rocket Warehouse password reveal (post-game).

  • Wild: Machop, Ponyta, Geodude outside; Slugma and Magmar within Mt. Ember.
  • Trainers: Black Belts, Pokémaniacs, Cooltrainers with Lv38–44 teams.
  • Items: HM06 Rock Smash (from Island 2), Fire Stone, Rare Candies, Ruby plate.

Two Island & Cape Brink

Bike shop errand and Lostelle’s kidnapping arc. Cape Brink tutors the starters with exclusive moves.

  • Encounters: Psyduck, Slowpoke, Shellder via Super Rod.
  • Items: Powder Jar from the house, Tutor moves (Blast Burn, Hydro Cannon, Frenzy Plant).
  • Tips: Clear the Game Corner to unlock Berry Forest; trade mushrooms to teach Softboiled.

Three Island & Berry Forest

Biker gang invasion, then a trek through Berry Forest to calm Lostelle’s Hypno encounter.

  • Wild: Drowzee/Hypno, Venomoth, Pidgeot, Persian (grass); Psyduck via Surf.
  • Items: Pinap/Apicot Berries, Full Restore, Moon Stone, Rare Candy.
  • Tips: Talk to the man near the dock for the Up-Grade after clearing the bikers.

Four Island & Icefall Cave

Breeding hub with Lorelei’s Delibird quest. Icefall Cave hides HM07 Waterfall and Lapras spawns.

  • Wild: Swinub, Delibird, Lapras (Icefall), Zubat/Golbat.
  • Items: HM07 Waterfall, NeverMeltIce, Ultra Ball, Lorelei’s house unlock.
  • Tips: Breed Eevee/Starter combos here thanks to the dedicated Day-Care.

Five Island · Rocket Warehouse

Home to the Rocket remnant, Resort Gorgeous trainer farming, and the Warehouse that requires two passwords.

  • Encounters: Tentacruel (surf), Mantine (LG), Qwilfish (FR), Meowth/Persian on land.
  • Items: TM01 Focus Punch, TM60 Hidden Power, Sapphire (post-game), Togepi egg quest.
  • Tips: Clear Team Rocket to receive the Rainbow Pass for Islands 4–7.

Six Island · Dotted Hole & Pattern Bush

Maze of Bug Catchers plus the Dotted Hole puzzle for the Sapphire plate.

  • Wild: Heracross, Beedrill, Ariados in Pattern Bush; Tentacruel along the shore.
  • Items: Sapphire (main plot), Nuggets, Elixirs.
  • Tips: Follow the hole sequence (Up, Left, Right, Down) to reach the core.

Seven Island · Trainer Tower & Sevault Canyon

Endgame island featuring high-level trainers, the Tanoby Ruins (Unown), and the real grinding route.

  • Wild: Larvitar (Sevault Canyon, post-game), Phanpy (FR), Skarmory (LG), Unown (Ruins).
  • Items: Metal Coat, Dragon Scale, King’s Rock, Rare Berries.
  • Tips: Trainer Tower awards time-based prizes; use it to test Nuzlocke squads.

Endgame

Elite Four, Champion & Rematch Tech

Annotated gauntlet planning, PP economy, suggested levels, and rematch scaling once the Network Machine is online.

Elite Four – First Challenge

Recommended team level: 55–60. Sequence: Lorelei → Bruno → Agatha → Lance → Champion.

  • Lorelei: Dewgong 52, Cloyster 51, Slowbro 52, Jynx 54, Lapras 54. Use Thunderbolt/Leaf Blade.
  • Bruno: Onix 51, Hitmonchan 53, Hitmonlee 53, Onix 54, Machamp 56.
  • Agatha: Gengar 54, Golbat 54, Haunter 53, Arbok 56, Gengar 58. Use Psychic + Earthquake.
  • Lance: Gyarados 56, Dragonair 54 ×2, Aerodactyl 58, Dragonite 60. Bring Ice Beam + Thunderbolt.

Champion · Rival Finale

Teams vary by starter but always include Pidgeot 61, Alakazam 59, Rhydon 61, Arcanine/Gyarados/Exeggutor 61, plus final starter at 65.

  • Strategy: Lead with Jolteon/Ampharos vs. Pidgeot, switch to bulky Dark (Snorlax) vs. Alakazam, Grass/Water vs. Rhydon, Ice vs. starter final forms.
  • Items: Bring 10 Full Restores and Max Elixirs; there’s no shop between Lance and the Champion.
  • Rewards: Hall of Fame entry, credits, access to Sevii Islands part two.

Elite Four Rematch Scaling

After completing the Sevii Ruby/Sapphire quest, the Elite Four add new Pokémon and top out at Lv72.

  • Lorelei: Adds Slowking, Walrein. Ice Beam/Surf combos.
  • Bruno: Adds Steelix, Heracross. Bring Surf/Psychic.
  • Agatha: Adds Misdreavus, Gengar learns Thunderbolt.
  • Lance: Adds Kingdra and Salamence; Dragonite hits Lv75.
  • Champion: Rebuilt around mixed sweepers (Heracross, Tyranitar, Arcanine, Exeggutor, starter at Lv75).

Trainer Tower & Challenge Facilities

Seven Island’s Trainer Tower features Time Attack, Knockout, and Mixed modes with prizes like Up-Grades, Dragon Scales, and Metal Coats.

  • Strategy: Bring a fast sweeping pair for Double battles; AI scales to your levels.
  • Rewards: Completion times under 15 minutes yield rare held items, perfect for trade evolutions.

National Pokédex & Rainbow Pass

After the credits, talk to Professor Oak once you’ve:

  • Become the Pokémon League Champion.
  • Registered at least 60 species in the Kanto Pokédex.
  • Visited One Island with Bill so the ferry recognizes you.

Oak upgrades you to the National Dex, and Celio unlocks the Rainbow Pass so you can sail to Islands 4–7 and continue the story.

Ruby & Sapphire Quest (Complete Walkthrough)

Ruby – Mt. Ember

  1. Sail to One Island > Kindle Road > Mt. Ember; beat the two Rocket Grunts discussing “GOLDEEN need log.”
  2. Use Strength inside, hug the east wall, push the lone boulder, and descend the left-hand ladder pair to reach the lava chamber.
  3. Grab the Ruby tablet and return it to Celio—he rewards you with the Rainbow Pass.

Sapphire – Dotted Hole & Warehouse

  1. With the Rainbow Pass, clear Icefall Cave on Four Island (HM07 Waterfall, help Lorelei) then head to Six Island’s Ruin Valley.
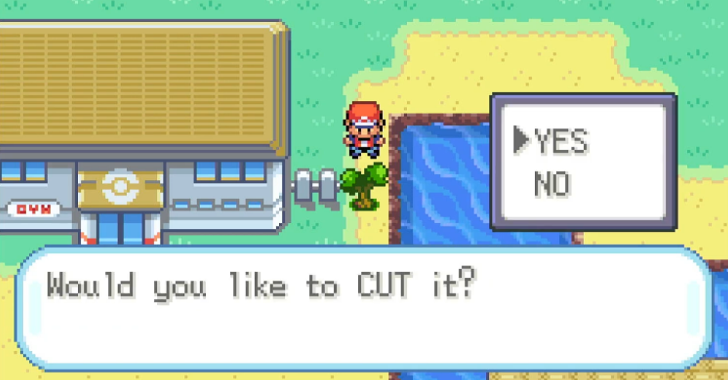
  2. Use Cut on the Dotted Hole door and follow the Braille order: UP → LEFT → RIGHT → DOWN. A scientist steals the Sapphire but gives password “Yes, nah, CHANSEY.”
  3. Travel to Five Isle Meadow, open the Team Rocket Warehouse with both passwords, ride the warp tiles, beat the Admin + Scientist, and recover the Sapphire.
  4. Deliver it to Celio to finish the Network Machine, enabling Hoenn trades, National Dex evolutions, and every Sevii facility.

Legendary & Event Pokémon Checklist

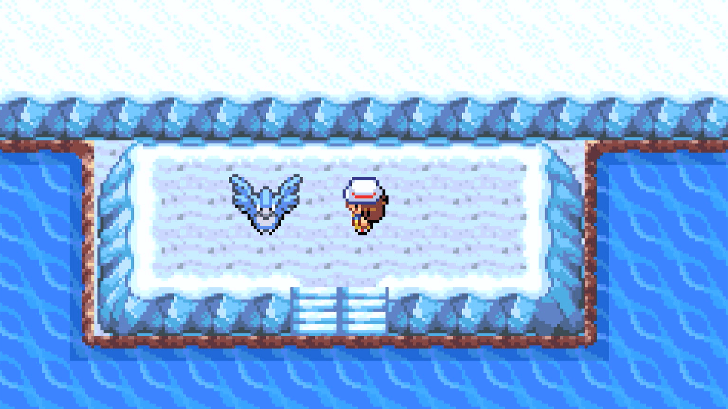
  • Kanto birds: Articuno (Seafoam B4F), Zapdos (Power Plant), Moltres (Mt. Ember summit) at Lv50.
  • Johto beasts: After the Sapphire is delivered, Entei/Raikou/Suicune roam depending on your starter. Repel + Lv49 lead helps force encounters.
  • Mewtwo: Cerulean Cave opens post-Sevii; bring Mean Look, status support, and plenty of Ultra Balls for the Lv70 battle.
  • Event islands: Birth Island (Deoxys) and Navel Rock (Ho-Oh/Lugia) require event tickets; Tanoby Ruins unlock all Unown once the Sevault Chamber puzzle is solved.
  • Non-Kanto species: Islands 4–7 add Johto babies, move tutors (Softboiled, Swords Dance, Elemental Punches), and Day Care breeding to finish the National Dex.

Trainer Card & 100% Goals

Match Game8’s completion checklist to earn all four Trainer Card stars:

  • Star 1 – Defeat the Elite Four and Champion once.
  • Star 2 – Complete the Kanto Pokédex (Mew optional).
  • Star 3 – Complete the National Pokédex (event legends optional in Switch port).
  • Star 4 – Master both Two Island minigames: 200 jumps in Pokémon Jump and 200 berries in Dodrio Berry Picking.

Combine this with Trainer Tower, Battle Tower-style rematches, and legendary captures for a true 100% file.

Economy

Item Priorities & Affiliate Hooks

Budget your Poké Dollars, Rare Candies, and Move Tutor mushrooms with a curated tier list plus ready-made ad slots.

CategoryMust-havesWhy
TMsBrick Break, Thunderbolt, Ice Beam, Shadow BallGives mid-game squads the coverage to sweep Fuchsia → Indigo.
FieldRepel stack, Escape Rope, Ether, Smoke BallControl wild RNG while farming trainers for rematch specialties.
BerriesLum, Cheri, ChestoCheap answers to Koga’s Toxic spam and Sabrina’s Thunder Wave chain.
Held ItemsLeftovers, Scope Lens, King's RockFarm Cycling Road Snorlax tiles and Sevault Canyon for reusable sweep tools.
Battle ConsumablesX Special, Guard Spec., Dire HitStack vs. Elite Four rematches to snowball Calm Minders or growth sweepers.

Items & Locations

Key Pickups Across Kanto & Sevii

Everything important you should scoop on the way through Kanto—organized by progression so you never miss a stone, tutor, or HM gate.

Main Story Must-Grabs

  • Pewter City · Running Shoes (Route 3 aide) · use for faster VS Seeker loops.
  • Mt. Moon · Moon Stone ×2, TM46 Thief, Fossils (Helix/Dome) · revive later on Cinnabar.
  • Route 24/25 · Nugget Bridge reward, S.S. Ticket, TM45 Attract, hidden Ether.
  • Rocket Hideout · Lift Key, Silph Scope, Blackglasses, Moon Stone #3.
  • Pokémon Tower · Poké Flute storyline, Cleanse Tag, Rare Candy, Nugget.
  • Safari Zone · HM03 Surf, Gold Teeth (HM04 Strength), Dratini fishing spot, TM32 Double Team.
  • Silph Co. · Card Key, Lapras gift, TM36 Sludge Bomb, Master Ball.
  • Seafoam Islands · NeverMeltIce, TM14 Blizzard, Articuno catch.
  • Cinnabar Laboratory · Fossil revives, TM35 Flamethrower purchase, Move Tutor (Metronome).

Optional Power Picks

  • Route 10 Power Plant · Zapdos, TM25 Thunder, Electabuzz/Magmar spawns (version-based).
  • Route 16 Secret House · HM02 Fly, PP Up hidden behind the Snorlax tile.
  • Trainer Tower (Seven Island) · Metal Coat, Dragon Scale, Upgrade rewards for under-15 minute clears.
  • Berry Forest · Pinap/Apicot berries, Full Restore, Moon Stone, Lostelle quest completion.
  • Pattern Bush · Heracross/Venomoth EV grind plus rare Silverpowder (Itemfinder).
  • Dotted Hole · Sapphire plate puzzle (Up, Left, Right, Down) unlocking network trades.
  • Tanoby Ruins · Unlock Unown tablet puzzles for post-game lore.

Stone & Tutor Checklist

ItemLocationUse
Fire StoneCeladon Dept. Store 4F · Mt. Ember (hidden)Evolve Growlithe/Vulpix/Flareon.
Water StoneCeladon Dept. Store · Seafoam B3FEvolve Poliwhirl/Staryu/Shellder.
Thunder StoneCeladon Dept. Store · Power Plant itemEvolve Pikachu/Eevee.
Leaf StoneCeladon Dept. Store · Safari Zone Area 2Evolve Gloom/Weepinbell/Exeggcute.
Move TutorsEmber Spa (Rock Slide), Two Island (starter exclusives), Four Island (Waterfall path)Budget Big Mushrooms for Body Slam/Substitute/Softboiled.

High-Value Hidden Items

  • VS Seeker Loop · Cycling Road Leftovers, PP Up, Amulet Coin from the thirsty girl’s side quest.
  • Victory Road · TMs 02, 37, 50 plus multiple Full Restores—use Itemfinder every plateau.
  • Cerulean Cave · Max Revives, Ultra Balls, Nugget chains; perfect for Mewtwo prep.
  • Sevault Canyon · Dragon Fang, King’s Rock, Metal Coat (Itemfinder near ruin pillars).

Meta

Late-Game Tips & Fun Facts

Short encyclopedia entries on badge boosts, EV routing, weather control, and Move Tutor budgeting.

Badge boost management

Badge boosts apply mid-battle in FireRed/LeafGreen. Plan rematch rosters so Attack or Speed badges trigger right before sweeping moves to avoid wasted turns.

VS Seeker loops

Run Cycling Road (Routes 16–18) until level 40, then pivot to Elite Four resets for better XP/$ ratios once Amulet Coin is active.

Move Tutor economy

Big Mushrooms are finite. Prioritize Body Slam for Snorlax, Softboiled for Chansey, and Substitute for sweeper cores before experimenting.

Weather control

Sunny Day pre-Blaine or Rain Dance pre-Lance still matters. Use the Team Builder to ensure at least one setter before mid-game.

Moves

Signature Move Lists

Pulled from Game8 move archives plus Bulbapedia learnset charts. Use this for quick coverage planning without digging through separate tabs.

High-Impact TMs

  • TM24 Thunderbolt · Celadon Game Corner (₱80,000) or Power Plant pickup — Sabrina & Lorelei answer.
  • TM13 Ice Beam · Game Corner (₱80,000) or Seafoam B4F — mandatory for Lance, Giovanni, post-game Dragonites.
  • TM30 Shadow Ball · Pokémon Tower B3F — Snorlax/Gengar coverage vs. Sabrina/Agatha.
  • TM03 Water Pulse · Misty reward — immediate upgrade for Squirtle/Vaporeon.

Type Spotlights

TypeKey MovesNotes
GhostShadow Ball, Night ShadeShadow Ball TM is physical in Gen 3—give it to Snorlax or Gengar for Sabrina.
SteelIron Tail, Metal ClawSteel hits Ice and Rock neutrals; Iron Tail TM from Safari Zone warden.
DragonDragon Claw, OutrageDragon Claw TM sits in Victory Road 2F; Outrage tutor on Two Island.
Fairy (status)Charm, Sweet KissEven without Fairy typing, these utility moves enable stall vs. Lance.

Progression

HM / TM Progress Tracker

Never wonder where Cut or Surf live again. Use this list to plan backtracking loops.

Core HMs

  • HM01 Cut · S.S. Anne captain — unlocks Route 16 Fly house, Diglett’s Cave trees.
  • HM02 Fly · Secret house on Route 16 — grab immediately after shooing Snorlax.
  • HM03 Surf · Safari Zone (Area 3) — mandatory for Koga completion + Sevii.
  • HM04 Strength · Fuchsia Warden after returning Gold Teeth — controls Safari boulders.
  • HM05 Flash · Route 2 aide (10 Pokédex) — required for Rock Tunnel.
  • HM06 Rock Smash · One Island after Ruby quest — Sevii expansion.
  • HM07 Waterfall · Icefall Cave (Four Island) — post-game traversal.

High-Value TMs

  • Brick Break · S.S. Anne (Room 2) — answers Snorlax and Clefable.
  • Calm Mind · Celadon Dept. Store — Sabrina + Elite Four sweeps.
  • Earthquake · Viridian Gym reward — keep for late-game sweepers.
  • Flamethrower · Game Corner (₱80,000) — best Fire TM pre-Blaine.
  • Sludge Bomb · Rocket Hideout (pickup) — Venusaur/Crobat staple.

Mechanics

Ability Cheat Sheet

Condensed references for ability triggers sourced from Game8 theory articles and Bulbapedia mechanics pages.

AbilityPokémonEffectStrategic Note
Blaze / Torrent / OvergrowStarter final formsBoosts matching type moves at <=1/3 HPIntentionally drop into range before big STAB nukes in rematches.
IntimidateGyarados, Arcanine, Salamence (trade)-1 Attack to foes on switch-inLead with these vs. Fighting routes (Routes 16–18, Elite Four Bruno).
SynchronizeAbra line, EspeonCopies burn/paralysis/poison back to foeGreat for forcing status on Rival’s Alakazam or Koga’s Muk.
PickupMeowth, Zigzagoon (trade)Grabs random items after battlesFarm Nuggets/Rare Candies while grinding Cycling Road.
Compound EyesButterfree, VenomothBoosts accuracy by 30%Ensure Sleep Powder hits vs. legendaries like Articuno.
Thick FatLapras, Dewgong, Snorlax (via Emerald tutor)Halves Fire/Ice damageHard-counters Blaine and Lorelei when stacking RestTalk cores.
Natural CureStarmie, Blissey (trade)Heals status on switchingSpam Thunder Wave/Recover without stocking dozens of Full Heals.
SturdyGeodude line, Magnemite linePrevents OHKO movesLets Graveler survive stray crits/explosions in Victory Road.
Swarm / StaticBeedrill, Venomoth / Pikachu, MagnetonBoosts Bug moves / inflicts paralysis on contactPick your encounter farms accordingly (e.g., Static Pikachu for Light Balls).

Optimization

Nature Pairings

Quick grid referencing Game8’s competitive recommendations blended with Serebii stat spreads.

Offense

  • Adamant · Gyarados, Snorlax, Dugtrio.
  • Modest · Jolteon, Starmie, Alakazam.
  • Timid · Sceptile tradebacks, Espeon, Raichu.

Defense / Utility

  • Bold · Vaporeon, Slowbro.
  • Calm · Blissey trade, Hypno.
  • Impish · Skarmory (LG exclusive), Steelix (trade).

Speed Control

  • Jolly · Crobat (Safari Zone), Aerodactyl (Fossil).
  • Naive · Mixed Dragonite with Fire Blast.
  • Hasty · SubPunch Breloom (trade from Hoenn).

News

Latest Updates

Live log of guide progress, asset refreshes, and Cloudflare Pages deployment markers.

  • Mar 9, 2026: Cloudflare Pages migration plan + wrangler config staged; awaiting API token for live deploy.
  • Mar 7, 2026 (19:15 ET): All Pokémon table, abilities, natures, gym counters, and tutor sections expanded prior to deployment.
  • Mar 7, 2026: Phase 1 scaffold online — new Game8-style layout, Pokédex index, move/ability cheat sheets.
  • Mar 6, 2026: Telegram bot @openclaw_arendashn_bot linked for milestone pings.
  • Mar 5, 2026: Netlify deploy firered-companion-2026 baseline archived for reference.

About

About This Project

Built by Game8Builder with a mandate to exceed the polish of Game8’s own FRLG wiki while keeping Bulbapedia-level depth.

This hub merges three data backbones: Bulbapedia’s exhaustive prose, Serebii’s encounter math, and Game8’s digestible layouts. Every paragraph is rewritten from scratch, every tool runs locally (no trackers), and every ad slot is clearly labeled. The project now targets Cloudflare Pages for hosting (wrangler config included) while keeping the Netlify baseline archived for reference.

Tools

Team Builder

The full squad planner now lives on its own fast-loading slug with autosave, updated palette, and future sync hooks.

What moved to the dedicated page?

  • 6-slot squad grid with live type badges and weakness counts.
  • Coverage heatmap that flags stacked weaknesses in real time.
  • Premium CTA rail for pro suggestions + Stripe checkout.

Same localStorage persistence, now with room for future sync + import/export without weighing down the main hub.

Launch Team Builder

Preview

Gradient squad cards + neon grid

Open the standalone page to see the new colorful UI with animated chips and a responsive layout tuned for mobile.

Tools

Nuzlocke Tracker

The tracker graduated to its own slug so it can focus on logging encounters, deaths, and clauses without hauling the entire wiki.

Standalone tracker perks

  • Route/encounter/death log with inline actions and filters.
  • Ruleset banner + auto-updating death counter.
  • Local persistence with room for export/import and share codes.

Use it mid-run on mobile, then jump back to the walkthrough via the global nav when you need context.

Open Nuzlocke Tracker

Tracker View

Reactive table + death meter

Dark neon table styling mirrors the new aesthetic and keeps key stats pinned at the top.